 A Reverse proxy is a convenient method to remotely access your media server’s web interfaces. When you are done with this guide you will be able to use your free dynamic DNS address (Mac OSX Afraid DNS Guide) like htpcguides.crabdance.com/htpc instead of htpcguides.crabdance.com:8085. This means fewer open ports on your router leaving you more secure while simultaneously having a convenient URL to access HTPC Manager behind an nginx reverse proxy. This guide was tested on Windows 8 but should work on Windows 7 and Windows Server editions too. Make sure you have installed HTPC Manager on Mac OSX first.
Configure HTPC Manager Reverse Proxy Mac OSX
Configure HTPC Manager for Reverse Proxy
Go to your HTPC Manager web interface at http://ip.address:8085
Click the settings drop down in the top right and choose Settings
Click General and adjust Webdir to the easy to remember location where you want to access HTPC Manager
For Webdir I have left the existing / and added htpc after it.
You should also choose a username and strong password if you want access outside your home network.
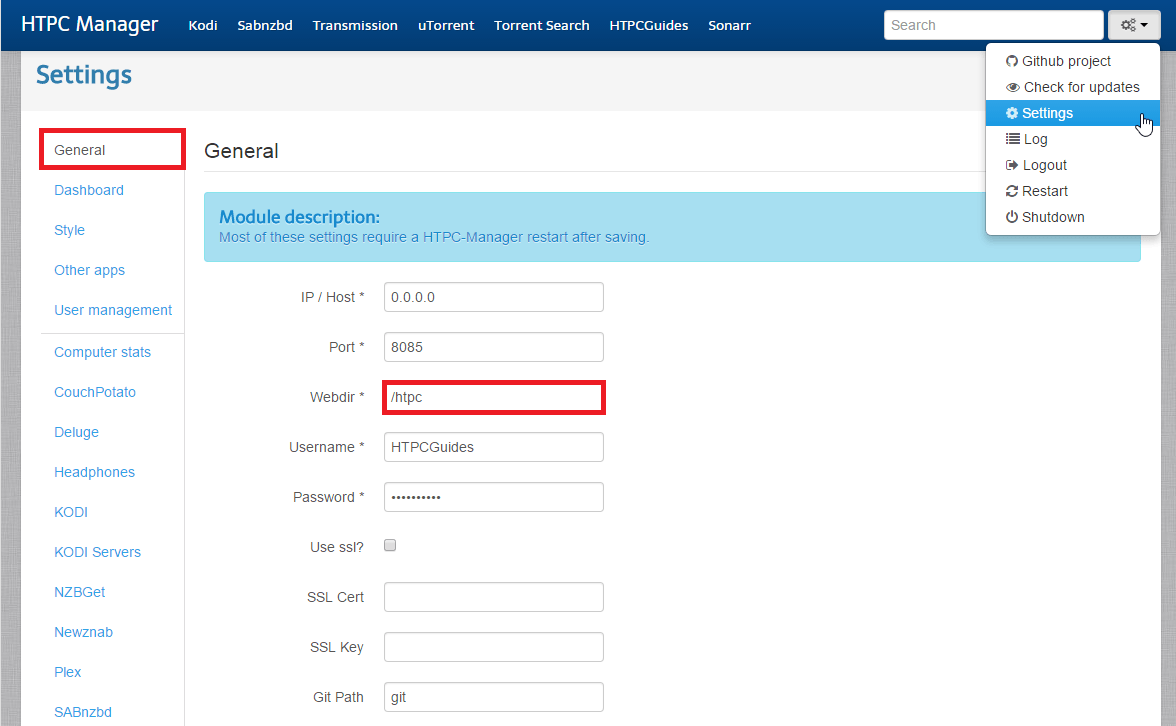
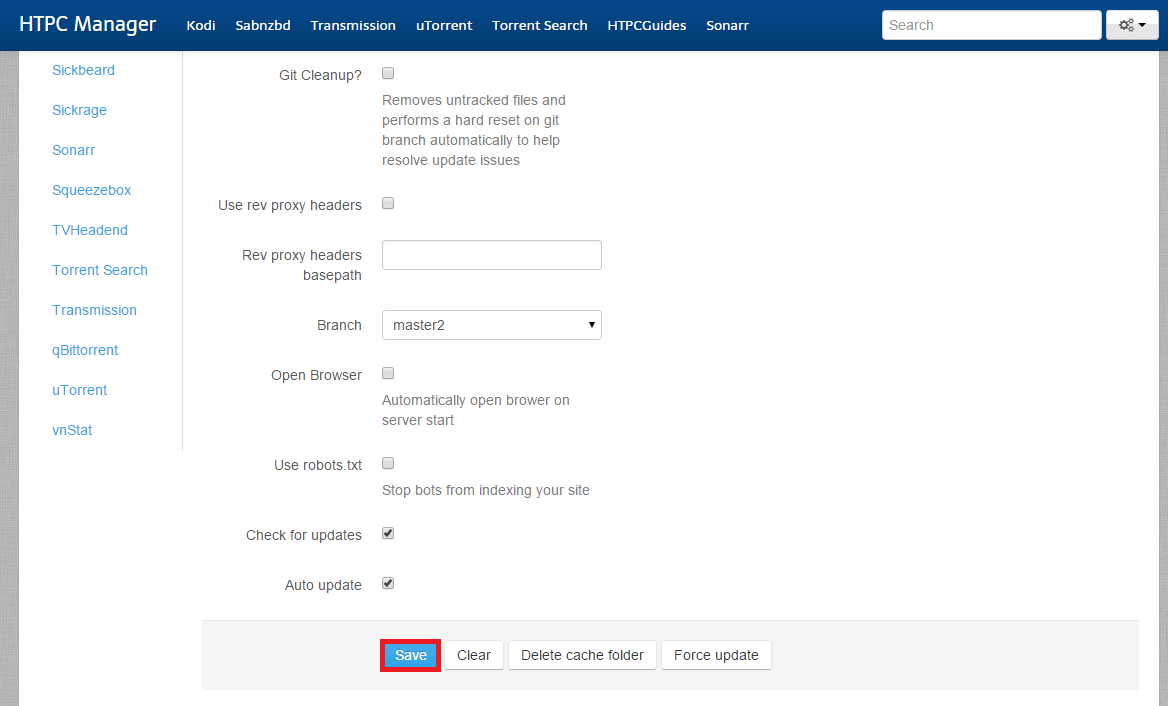
Scroll down, leave the reverse proxy header sections empty, nginx handles this part
Click Save and restart HTPC Manager
You do not need to enable SSL here, nginx will handle SSL (creating certificate guide here) and there is no reason to SSL behind SSL.
Configure nginx with HTPC Manager Reverse Proxy
You need x-code tools which is a collection of command line tools which includes git which is necessary to grab the latest HTPC Manager
All of the following commands are run in the Mac Terminal
xcode-select --installInstall HomeBrew for Mac which faciliates the installation of other software
ruby -e "$(curl -fsSL https://raw.githubusercontent.com/Homebrew/install/master/install)"Install nginx using Homebrew
brew install nginxEnable nginx to autostart on boot by copying the nginx plist file to the LaunchDaemons directory so it runs as root, if you don't nginx wont run on port 80
sudo cp /usr/local/opt/nginx/*.plist /Library/LaunchDaemons/homebrew.mxcl.nginx.plistEdit the default nginx configuration
nano /usr/local/etc/nginx/nginx.confFind this section and change listen to 80, your server_name localhost to your dynamic dns address and your media server's local IP address as shown in the block after this
server {
        listen       80;
        server_name  localhost;

        #charset koi8-r;

        #access_log  logs/host.access.log  main;
Mine looks like this so I can access it locally and remotely, replace the red text with your dynamic DNS address and the server's local IP
server {
        listen       80;
        server_name  htpcguides.crabdance.com 192.168.40.105;

        #charset koi8-r;

        #access_log  logs/host.access.log  main;
Underneath add these lines, the location must match what you set the Webdir to in HTPC Manager
location /htpc {
		proxy_pass http://127.0.0.1:8085;
		proxy_set_header Host $host;
		proxy_set_header X-Real-IP $remote_addr;
		proxy_set_header X-Forwarded-For $proxy_add_x_forwarded_for;
	}
The whole nginx server section will now look something like this
server {
        listen       80;
        server_name  htpcguides.crabdance.com 192.168.40.105;

        #charset koi8-r;

        #access_log  logs/host.access.log  main;

	location /htpc {
		proxy_pass http://127.0.0.1:8085;
		proxy_set_header Host $host;
		proxy_set_header X-Real-IP $remote_addr;
		proxy_set_header X-Forwarded-For $proxy_add_x_forwarded_for;
	}
Run nginx
sudo nginxNow you can access HTPC Manager at http://ip.address/htpc
You may need to reboot for nginx to work since it is running as root