![]() OpenSSL can be used to create your own web server certificates for use with nginx or Apache. In this guide I show you how to create an SSL certificate using OpenSSL and configure your web server nginx to use the https protocol. I needed SSL certificates for use with reverse proxies for Sabnzbd, NZBGet, Sonarr, SickRage, CouchPotato and others. I managed to get OpenSSL generating certificates on Windows, Mac and Linux so I have consolidated them all into this guide as opposed to making separate posts – feedback on whether this was a good idea or not is welcome in the comments.
OpenSSL can be used to create your own web server certificates for use with nginx or Apache. In this guide I show you how to create an SSL certificate using OpenSSL and configure your web server nginx to use the https protocol. I needed SSL certificates for use with reverse proxies for Sabnzbd, NZBGet, Sonarr, SickRage, CouchPotato and others. I managed to get OpenSSL generating certificates on Windows, Mac and Linux so I have consolidated them all into this guide as opposed to making separate posts – feedback on whether this was a good idea or not is welcome in the comments.
Generate OpenSSL Certificates for nginx
I will assume you have already installed nginx already. If you haven't you can use this Windows, Mac or Linux guide – though you can also install it on Mac with Homebrew which is much easier, however the paths will be different and you will have to adjust them accordingly in this guide. This guide does not help you create SSL certficates from a Certified Authority so you will get warnings that the SSL certificate is not trusted – however, there is no reason not to trust a certificate that you have created yourself! However if you do want an official certificate you can get one for free from StartSSL that you will have to renew each year.
OpenSSL on Windows
You will need the VC 2008 redistributable for Windows
Win32 OpenSSL or Win64 OpenSSL light. The 32-bit version runs fine on 64-bit machines and is used for this guide.
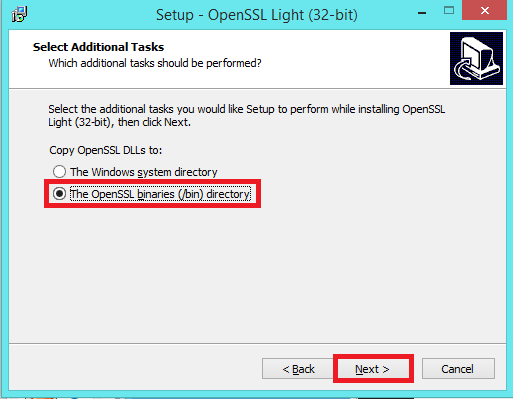
If you don't plan on using OpenSSL again then choose for the dll files to be installed to /bin
OpenSSL on Mac OSX
OpenSSL on Mac is done in the Terminal, we need to install x-code utilities and Homebrew in order for OpenSSL to be installed.
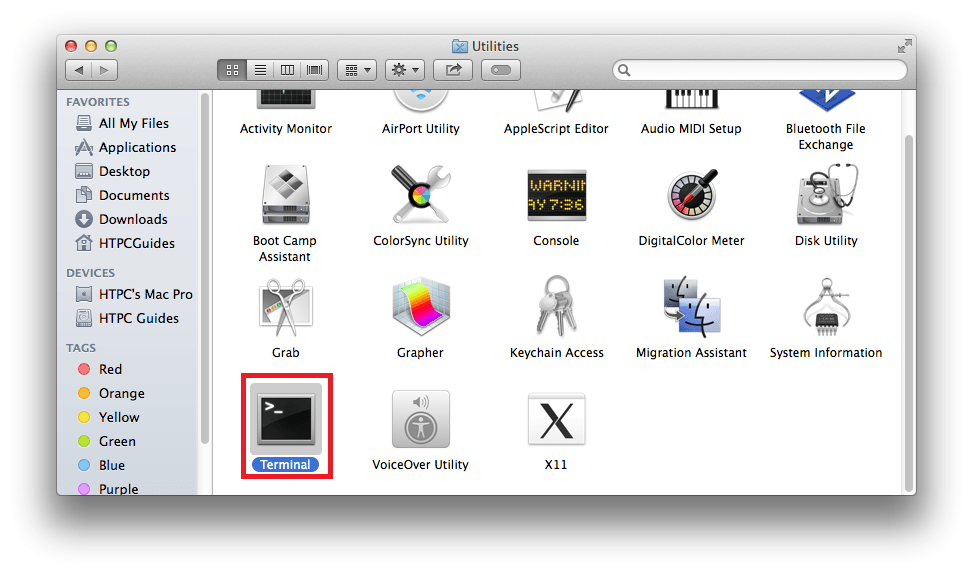
You can find Terminal in Applications -> Utilities

Now Scroll down to Terminal and open it
The Mac Terminal is white.

In Terminal, install the command line tools
xcode-select --install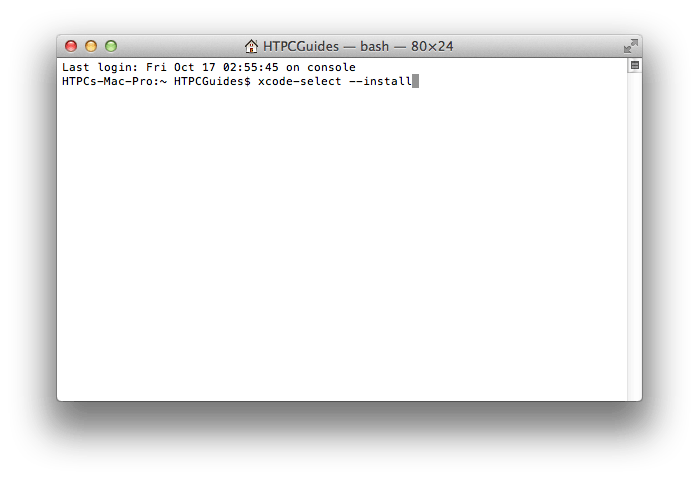
You will get a pop up asking to install command line tools. Click Install.
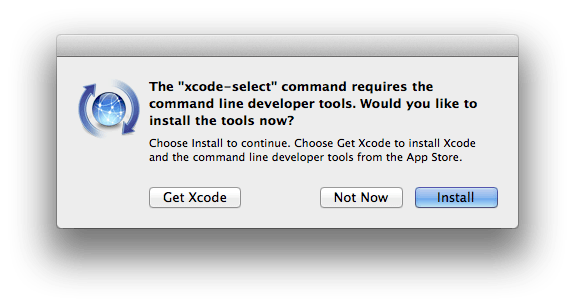
If it says it couldn't be found then you already have command line tools installed
Install Homebrew
Run the Terminal and enter this command
ruby -e "$(curl -fsSL https://raw.githubusercontent.com/Homebrew/install/master/install)"Run homebrew doctor as the installation says
brew doctorNow install openssl using Homebrew for Mac
brew install opensslOpenSSL on Linux
On Linux it couldn't be easier, this works on Debian, Ubuntu, Raspbian and should work on any debian based system
sudo apt-get install openssl -yCreate the SSL Certificate with OpenSSL
A quick explanation about the best encryption. Other guides use des which is outdated and slow (Source). AES encryption has won awards for its strength, your home router is capable of AES encryption. There is a quick overview of AES encryption types. We will be using RSA which is also a respectable encryption method.
Open a command prompt for Windows or terminal for Mac and Linux
On Linux or Mac create an SSL directory
sudo mkdir -p /etc/nginx/sslNow to create the actual SSL certificates, it will last 36500 days and have rsa 2048 bit encryption. The nodes switch means we don't have to enter the server key's password each time you connect to the nginx web server.
Create the certificate and key on Linux or Mac
sudo openssl req -x509 -nodes -days 36500 -newkey rsa:2048 -keyout /etc/nginx/ssl/nginx.key -out /etc/nginx/ssl/nginx.crtIf on Windows the command is almost identical, only the paths are different
Create nginx Windows SSL certificate
openssl req -x509 -nodes -days 36500 -newkey rsa:4096 -keyout /nginx-1.6.2/conf/nginx.key -out /nginx-1.6.2/conf/nginx.crtYou will see this error if you did not run the command prompt as an administrator in Windows or if the folder you are attempting to create the files in does not exist.
unable to write 'random state'
writing new private key to '/nginx-1.6.2/config/nginx.key'
/nginx-1.6.2/config/nginx.key: No such file or directory
7996:error:02001003:system library:fopen:No such process:bss_file.c:398:fopen('/
nginx-1.6.2/config/nginx.key','wb')
7996:error:20074002:BIO routines:FILE_CTRL:system lib:bss_file.c:400:
On all operating systems you will be prompted for some information, you can leave them all blank if you like
You are about to be asked to enter information that will be incorporated
into your certificate request.
What you are about to enter is what is called a Distinguished Name or a DN.
There are quite a few fields but you can leave some blank
For some fields there will be a default value,
If you enter '.', the field will be left blank.
-----
Country Name (2 letter code) [AU]: DK
State or Province Name (full name) [Some-State]: Utopia
Locality Name (eg, city) []: Gotham
Organization Name (eg, company) [Internet Widgits Pty Ltd]: HTPC Guides
Organizational Unit Name (eg, section) []: Admin
Common Name (e.g. server FQDN or YOUR name) []: HTPCGuides.com
Email Address []: admin@htpcguides.com
Now you can actually configure nginx to use the SSL certificates
Configure nginx with SSL
Configure nginx to use SSL with Mac and Linux
Open the Linux nginx configuration file, adjust reverse if your file is different
sudo nano /etc/nginx/sites-available/reverseOn Mac following my nginx installation guide open the configuration file which should be in one of these locations, the 2nd is for nginx installation using homebrew
sudo nano /usr/local/nginx/conf/nginx.conf
sudo nano /usr/local/etc/nginx/nginx.conf
Add the listen 443 ssl; and ssl_certificate lines, make sure your server_name is set
server {
        listen       80;
        server_name  HTPCGuides.com 192.168.40.100 localhost;

	listen 443 ssl;

	ssl_certificate /etc/nginx/ssl/nginx.crt;
	ssl_certificate_key /etc/nginx/ssl/nginx.key;
	root /usr/share/nginx/html;
	index index.html index.htm;

	location / {
	try_files $uri $uri/ =404;
	}
}
Hit Ctrl+X, Y and Enter to save the configuration and restart nginx in Linux
sudo service nginx restartOn Mac you can either reboot or restart the plist script
sudo nginx -s reloadThat is all that should be necessary for Mac and Linux
Configure nginx to use SSL with Windows
Open the Windows nginx configuration file c:\nginx-1.6.2\conf\nginx.conf
Add the listen 443 ssl; and ssl_certificate lines, set your server_name correctly with the domain name and local IP of the machine
server {
        listen       80;
        server_name  HTPCGuides.com 192.168.40.100 localhost;

	listen 443 ssl;

	ssl_certificate /nginx-1.6.2/conf/server.crt;
	ssl_certificate_key /nginx-1.6.2/conf/server.key;

        #charset koi8-r;

        #access_log  logs/host.access.log  main;
Open up a command prompt with Administrator privileges and paste these commands
cd c:\nginx-1.6.2
nginx -s reload
That should do it, now you can access the nginx web server at https://ip.address and you should see your web site or the default nginx page.
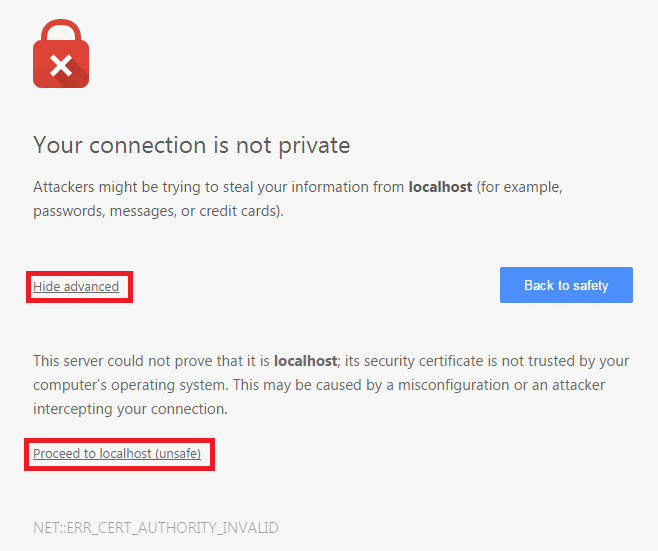
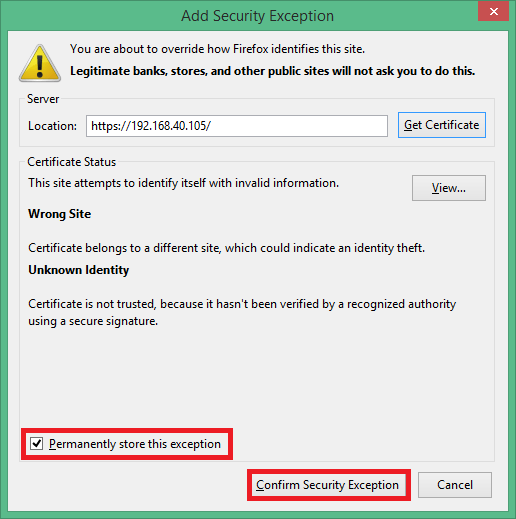
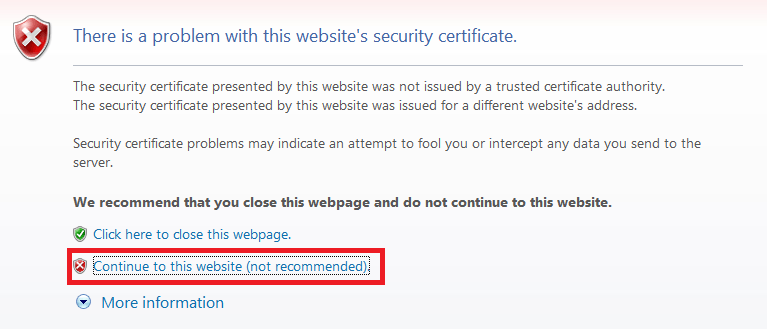
When you do open it you will see some warnings which you have to click past. The reason you get these warnings is because you created the certificate yourself and did not acquire it from a Certified Authority (CA). This is how to store the certificates you just created in your browser so the warning disappears for your personal site. If you ever get this warning when trying to visit a commercial website you should check your computer for viruses and malware.
In Chrome you need to click Show advanced and Proceed to ip.address (unsafe)
In Firefox click I understand the risks and Add Exception

Then check Permanently store the exception and click Confirm Security Exception
In Internet Explorer click Continue to this website
Now it's really done unless you are sharing this site with others in which case you can optimize https too if you are using it beyond personal usage.
Remember to open port 443 on your router!