
PureVPN is the best VPN software for one simple, yet powerful reason: choice. Most VPNs force you to tunnel your whole machine including all of its applications and processes through the VPN. PureVPN understands people want choice.
There may be some applications you absolutely want to go through your VPN for security and privacy reasons. Alternatively there may be other applications you do not want to go through a VPN like if you have Sabnzbd, NZBget, Couchpotato, Nzbdrone or anything else you want to manage remotely outside your home network. This is an excellent feature that, to my knowledge, no other VPN service or client offers with the same ease of use to encrypt your traffic rather than just mask your IP with a proxy.
If you are interested in other options for a secure connection, consider reading Comparing Usenet vs Torrents – Which is Better?
The PureVPN application for Windows allows you to choose which programs you want to go through the VPN like utorrent. I created a guide to install PureVPN which prepares you to complete the current guide without issues. We will be forcing utorrent to use the PureVPN service. This guide assumes you already have an affordable PureVPN account and that you have not used the client before.
This is a simple diagram showing the benefits of PureVPN over other VPN services for file sharing
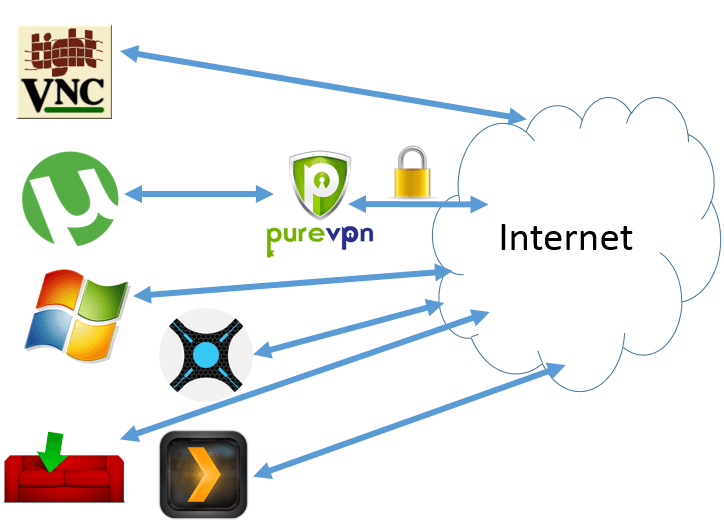
Simple utorrent VPN with PureVPN
If you did not follow my install guide you must make sure PureVPN runs as an administrator always.
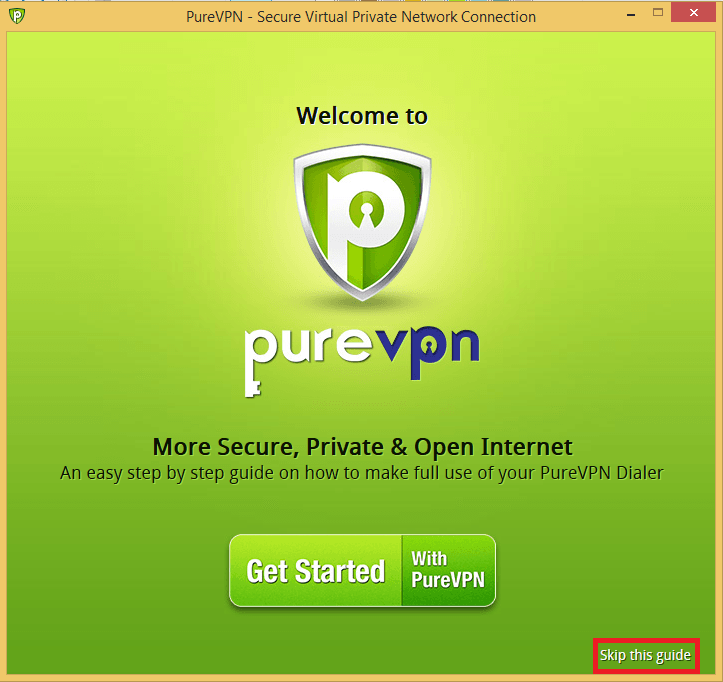
Open up PureVPN. You will see this very green screen. Click Skip this guide in the bottom right corner.
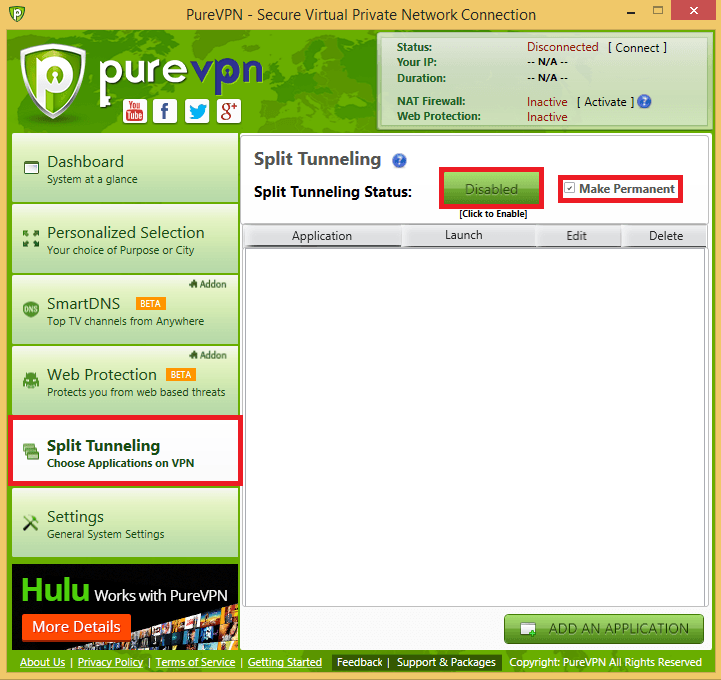
You will see the main screen. Click Split Tunneling on the left pane.
Check Make Permanent and then click the green Disabled button to enable Split tunneling.
The Disabled button will turn red and say Enabled.
Click Dashboard
Enter your username and password, check Remember me
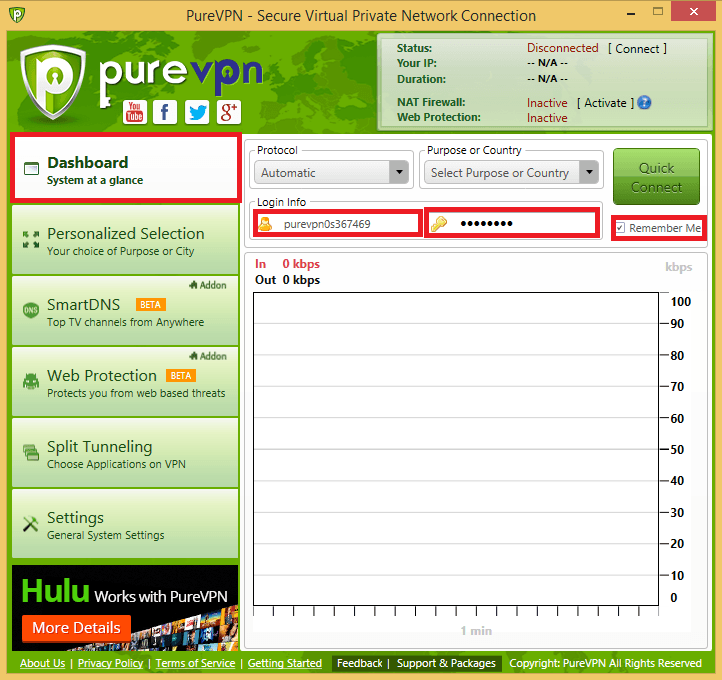
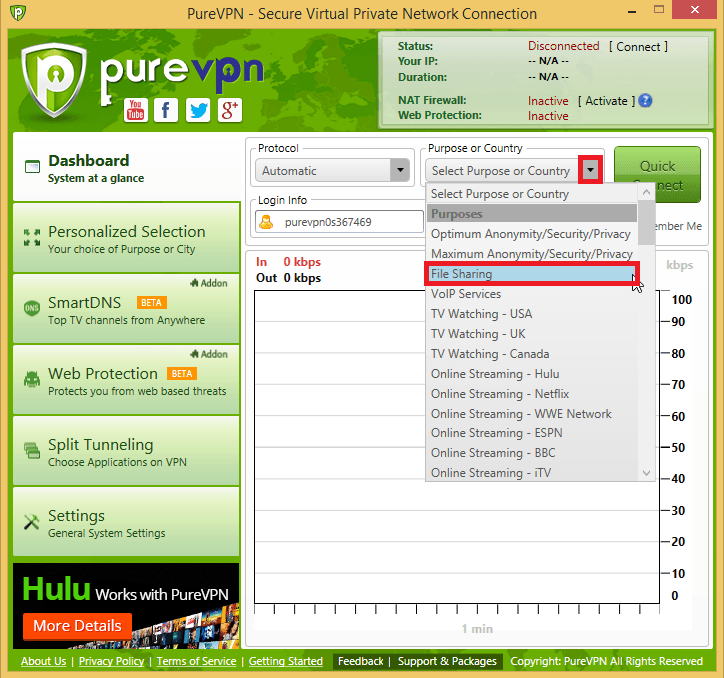
Now click the arrow for Purpose or Country and Choose File Sharing
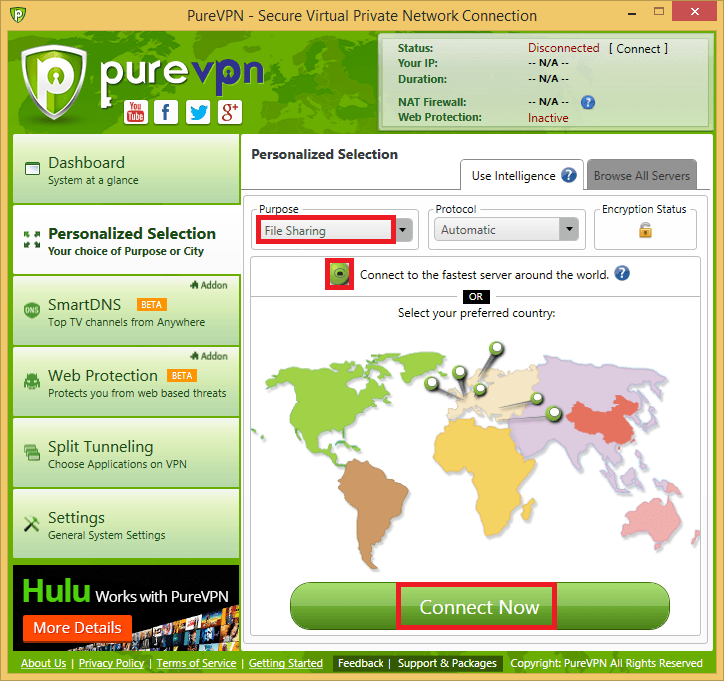
You will see this new screen. Click the green circle that says Connect to the fastest server.
Then Click Connect Now.
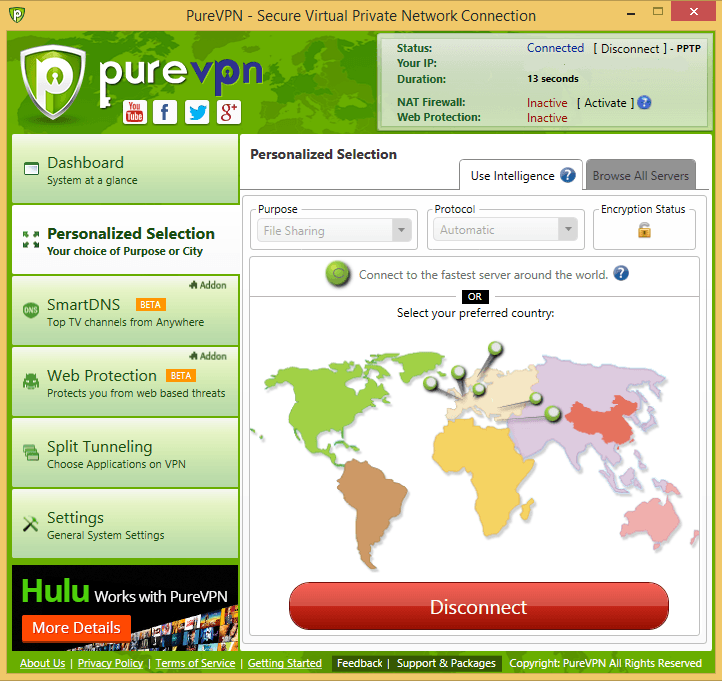
Now PureVPN is connected and should look like this
If you don't have Hidden items viewable in Windows Explorer you must do that first, in Windows 8.1 it is quite easy.
In any explorer window Click View and then check Hidden Items.

In Windows 7, it's Control Panel -> Appearance and Personalization.
Click Folder Options. In Advanced Settings click Show hidden files and folders.
Click OK.
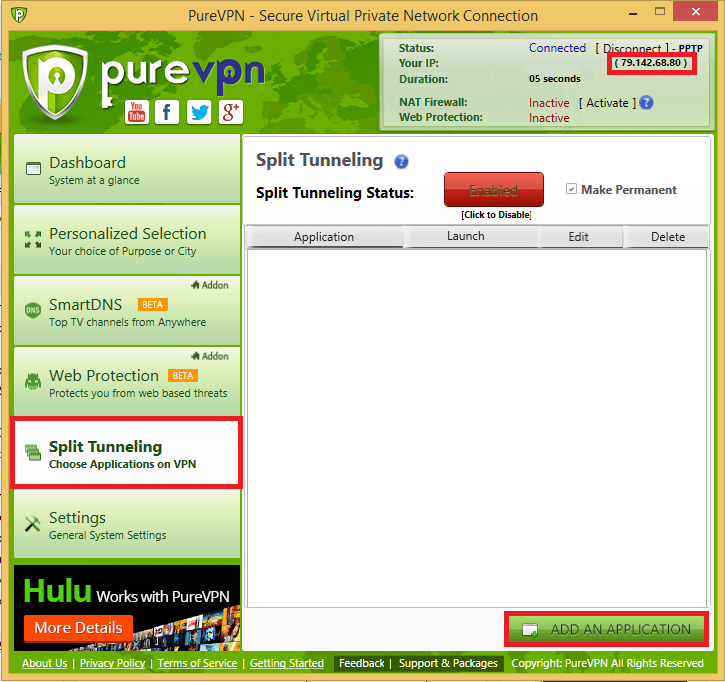
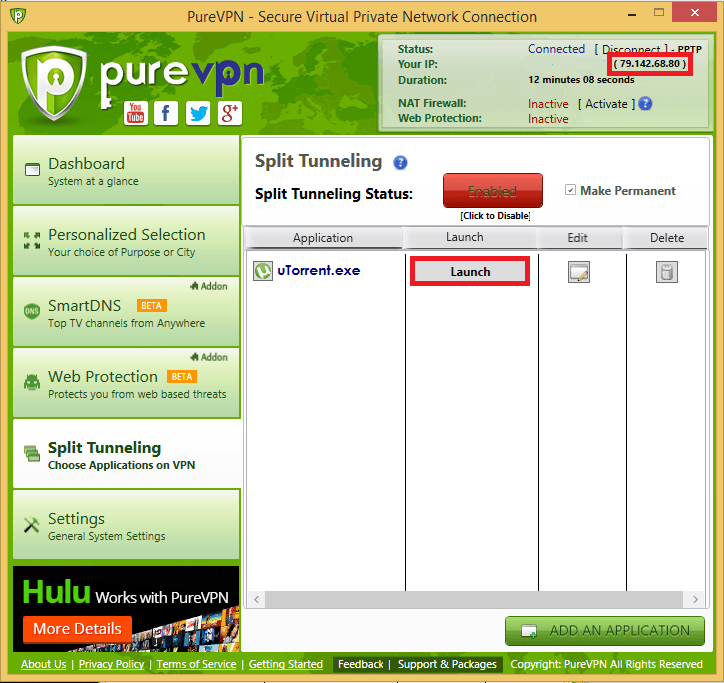
Back in PureVPN, click Split Tunneling in the left pane and then Add an Application.
Note: the IP address in parentheses is the IP address that will be shown to seeds in the torrent swarm which protects your identity.
Browse to where uTorrent is which is usually c:\Users\Username\AppData\Roaming\uTorrent
AppData will be greyed out if you enabled hidden folders correctly.

Now click Launch next to uTorrent
Now you can minimze PureVPN and it will hide in the system tray and run in the background.
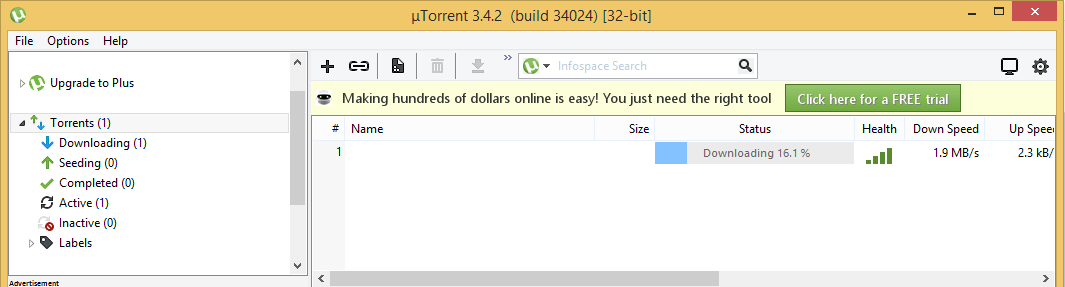
It's time to add a torrent and download to test the speed. I was able to still max out my connection ( I only get 1.9 MB/s)
That's it, now you are sending all of your traffic through utorrent encrypted and mask your IP. If you still want to remote control utorrent you can do so with my TightVNC guide.