 Mumble is a nice open source VoIP system popular with gamers. You can create your own private Mumble server that runs on the Raspberry Pi to use with your friends or gaming crew. One of the common problems with setting up a Mumble server is that sometimes your IP address will change, this means you have to find your new public IP address and tell all of your friends the new address. This is cumbersome and inconvenient, it is much easier to use a free dynamic DNS so your friends get an address like gameserver.crabdance.com to put in their Mumble client. This dynamic DNS address will be automatically updated as your public IP changes making it more convenient for you and your friends meaning you can spend more time gaming instead of dicking around with finding out IPs. You will learn how to secure your Mumble server to protect it from gaming trolls.
I recommend using Minibian and the initial setup for running Mumble as it is a lean, lightweight image for the Raspberry Pi that runs headless so you don't need any monitor. You can manage the Raspberry Pi Mumble server using your SuperUser account from a Windows or Mac machine with a Mumble client.
If you are trying to figure out which hardware would work best for you, consider reading the Pi benchmarks.
| Pi Unit | ||||||||
|---|---|---|---|---|---|---|---|---|
| Raspberry Pi 3 | Quad Core |
|||||||
| Raspberry Pi 2 | Quad Core |
|||||||
| Raspberry Pi | Single Core |
|||||||
| Banana Pi | Dual Core |
|||||||
| Banana Pi Pro | Dual Core |
Configure Mumble Server on Raspberry Pi with Dynamic DNS
Install Mumble Server on Raspberry Pi
Update and upgrade your packages
sudo apt-get update && sudo apt-get upgrade -yInstall the Mumble server
sudo apt-get install mumble-server -yDo some initial configurations for the Mumble server
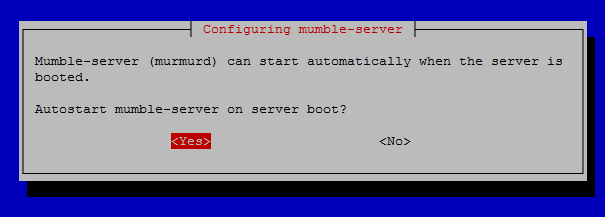
sudo dpkg-reconfigure mumble-serverSay Yes to starting Mumble on boot and press Enter
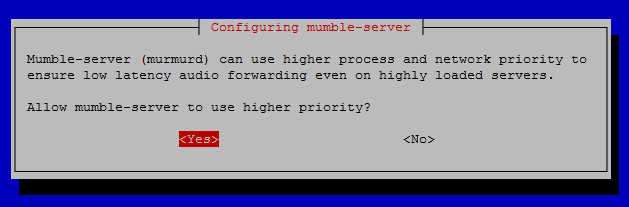
Allow the Mumble server to have higher priority to reduce likelihood of lag latency
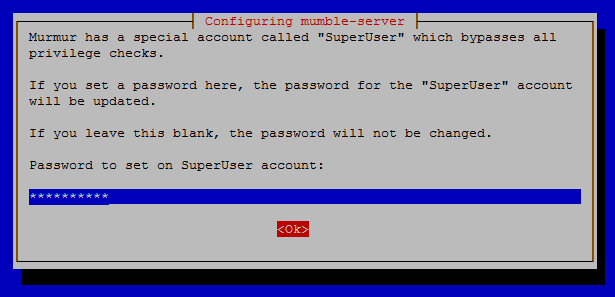
Set the SuperUser password, this is the account and password you can use to manage your Mumble users from your Mumble client
Configure Mumble Server
Make a backup of the Mumble configuration file.
sudo cp /etc/mumble-server.ini /etc/mumble-server.bakEdit the Mumble configuration file
sudo nano /etc/mumble-server.iniUncomment these lines by deleting the preceding # character so it looks like below.
autobanAttempts will ban an IP address after 7 failed attempts inside the autobanTimeframe (120 seconds or 2 minutes).
They will be banned for the length of autobanTime (600 seconds or 10 minutes)
# How many login attempts do we tolerate from one IP
# inside a given timeframe before we ban the connection?
# Note that this is global (shared between all virtual servers), and that
# it counts both successful and unsuccessful connection attempts.
# Set either Attempts or Timeframe to 0 to disable.
autobanAttempts = 7
autobanTimeframe = 120
autobanTime = 600
If you want a custom welcome message you can adjust the test here
# Welcome message sent to clients when they connect
welcometext="<br />Welcome to the HTPCGuides server running <b>Murmur</b>.<br />Enjoy $
If you are interested in having a more secure Mumble server you should consider changing the default port. Trolls may scan and attempt to automatically connect to Mumble servers on the default port which could ruin your gaming experience. You will have to tell your users the correct port if you do change this – it can be any number between 1 and 65535, but avoid using standard port numbers for other services like 21, 22, 80 and 8080.
# Port to bind TCP and UDP sockets to
port=64738
For additional security you should set a server password, you will need to give this to your friends so they can log on.
# Password to join server
serverpassword=htpcguides.com
Maximum users is how many users can be connected to your Mumble server simultaneously.
# Maximum number of concurrent clients allowed.
users=10
This is the bit rate used by the Mumble server. The higher the bits per second the more CPU and power the Raspberry Pi will need to convert voice to data and back again. If you find performance is bad you should consider lowering this value – don't forget to restart the server after adjusting this value.
# Maximum bandwidth (in bits per second) clients are allowed
# to send speech at.
bandwidth=72000
Ctrl+X, Y and Enter to save the Mumble configuration
sudo service mumble-server restartDo a test now using the Mumble Client and connect to your Raspberry Pi Mumble Server locally
Get your ip address with this command
ip addressFind your eth0 or wlan0 section and your IP is the address after inet shown highlighted in red below.
You should consider using static DHCP or setting a static IP address for your Raspberry Pi as it will make port forwarding much easier.
2: eth0: <BROADCAST,MULTICAST,UP,LOWER_UP> mtu 1500 qdisc pfifo_fast state UP qlen 1000
    link/ether b8:27:eb:f4:41:05 brd ff:ff:ff:ff:ff:ff
    inet 192.168.40.101/24 brd 192.168.40.255 scope global eth0
       valid_lft forever preferred_lft forever
    inet6 fe80::ba27:ebff:fef4:4105/64 scope link
       valid_lft forever preferred_lft forever
Now connect using the standard port or the custom port you set.
http://ip.address:64738
If you could connect now you can move on to making it easier for your friends to find your server without memorizing your IP address by telling your Raspberry Pi to keep a free dynamic DNS address updated with your IP as it changes.
You will need to port forward 64738 from your router to your Raspberry Pi first or whichever port you chose in the configuration file.
Nag Free Dynamic DNS on Raspberry Pi
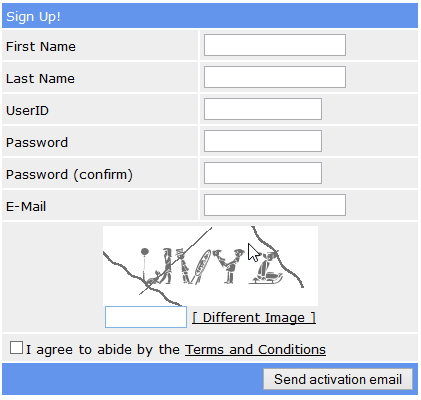
Sign up for a free dynamic DNS account first at freedns.afraid.org on any machine, you do not need to create the account on the Raspberry Pi
After creating your free account and remember to click the activation link in your email.
Now log in to your new free account and choose a domain
Click Subdomains on the left
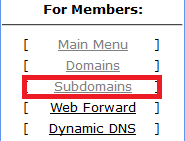
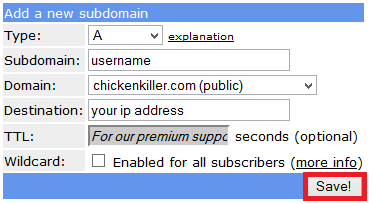
Then click Add subdomain
![]()
Choose your desired username, select a free domain and click Save
Your new Dynamic DNS address will be username.chickenkiller.com, there are other domains available like crabdance.com
Free Dynamic DNS Raspberry Pi Client
You will need your Direct URL from the Free Dynamic DNS account you just created.
Log in to your account at afraid.freedns.org and click Dynamic dns on the left pane. Scroll down and you will see a Direct URL hyperlink. The link looks something like this http://freedns.afraid.org/dynamic/update.php?HTPCGuidesSecretKey.
Right click and copy the URL of the Direct Link. You can paste this somewhere safe now or you can leave the window open and switch back to it. You will need this Direct URL shortly.
We will create a cronjob to run every 5 minutes and update your free dynamic DNS with your current IP address
Paste the code below but replace the URL http://freedns.afraid.org/dynamic/update.php?HTPCGuides with your direct link URL you copied to the clipboard.
crontab -l | { cat; echo "*/5 * * * * curl http://freedns.afraid.org/dynamic/update.php?HTPCGuides"; } | crontab -Restart the cron service
sudo service cron restartList cron jobs to make sure the freedns job is there
crontab -lIt should show
*/5 * * * * curl http://freedns.afraid.org/dynamic/update.php?HTPCGuides
I tested this several times and it is consistent, you can change the update interval by changing the */5 to */20 for every 20 minutes or whatever interval you choose.
Now your Mumble server can be accessed without your users knowing the IP address of the server, they can just input the free Dynamic DNS address and it will make your life easier as well as theirs.
Remember to open the Mumble port on your router and forward it to your Raspberry Pi.
You can administer your users with the SuperUser account and the password you set earlier.