 NZBGet is the perfect alternative to SABnzbd if you want something more robust and lightweight than Sabnzbd. It can seem a little intimidating at first but it is quite easy to setup for basic downloading. Once you are done you can move on to couchpotato and nzbdrone for a full home media server setup for your htpc. Let's configure nzbget for your platform.
At A Glance: Our Top 4 Picks For Usenet Providers
- Our Top Pick: UsenetServer
- Newshosting
- Frugal Usenet
- Usenetlink
You will need a usenet account first, preferably unlimited like with Usenetserver or Astraweb.
Quick Summary: Our Top Picks for Usenet Providers
Our Top Pick
|
UsenetServer |
|
VIEW LATEST PRICE → |

|
Newshosting |
|
VIEW LATEST PRICE → |
|
|
Frugal Usenet |
|
VIEW LATEST PRICE → |

|
Usenetlink |
|
VIEW LATEST PRICE → |
- Free Zero-Log VPN Included
- Free Unlimited Usenet Search
- 4319 Days Binary & Text Retention
Get UsenetServer for only $7.95/mo. and save 60% lifetime discount
Configure NZBGet
If you are on Windows and are getting error saving diskstate could not rename file issues, fix it by changing the permissions of your C:\ProgramData\NZBGet folder to Full control under the Users group.
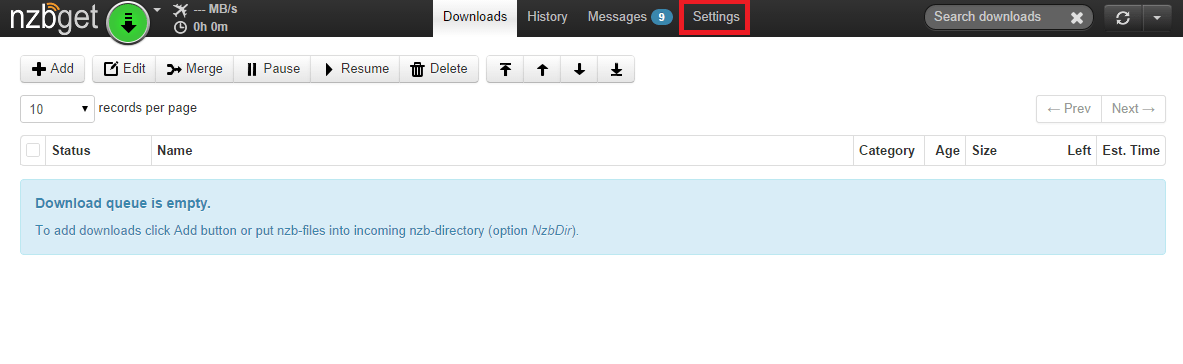
Fire up the NZBGet web interface at http://ip.address:6789, username: nzbget, password: tegbzn6789
You will be met with this screen. Click Settings
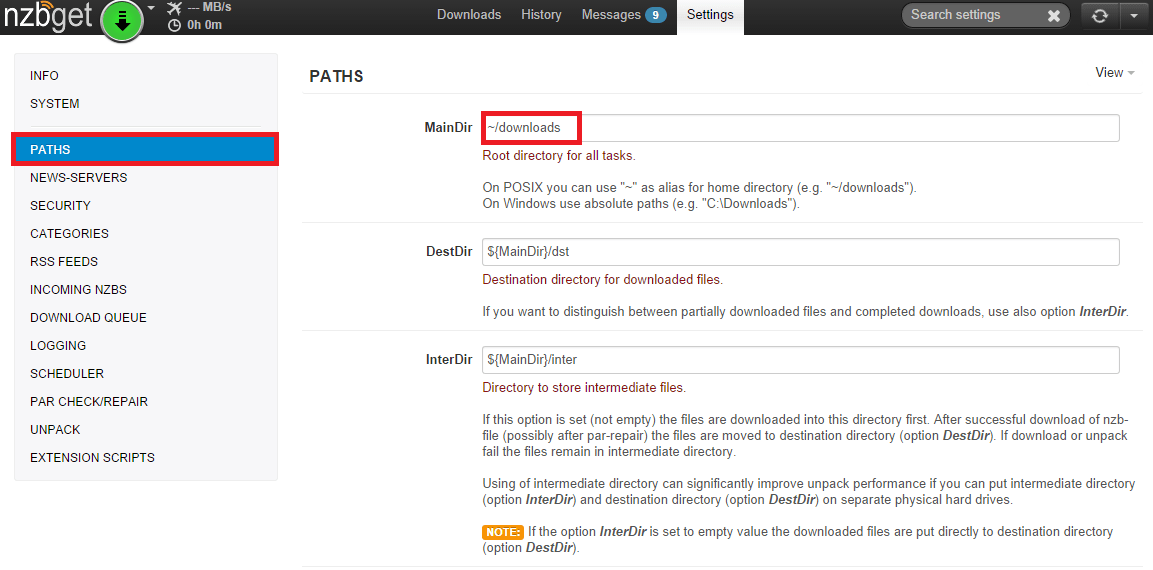
Now click PATHS, change your downloads directory if necessary (it should not be AppDir on Linux), if on the Raspberry Pi your MainDir should be your mounted hard drive that has been mounted properly as the pi user (e.g. /mnt/usbstorage). Linux users should use absolute paths (e.g. /home/user/downloads instead of ~/downloads). Windows users should use full paths like D:\Downloads
Your scripts folder in Linux may vary but if you are using my latest NZBGet installation method then it will be /opt/nzbget/scripts
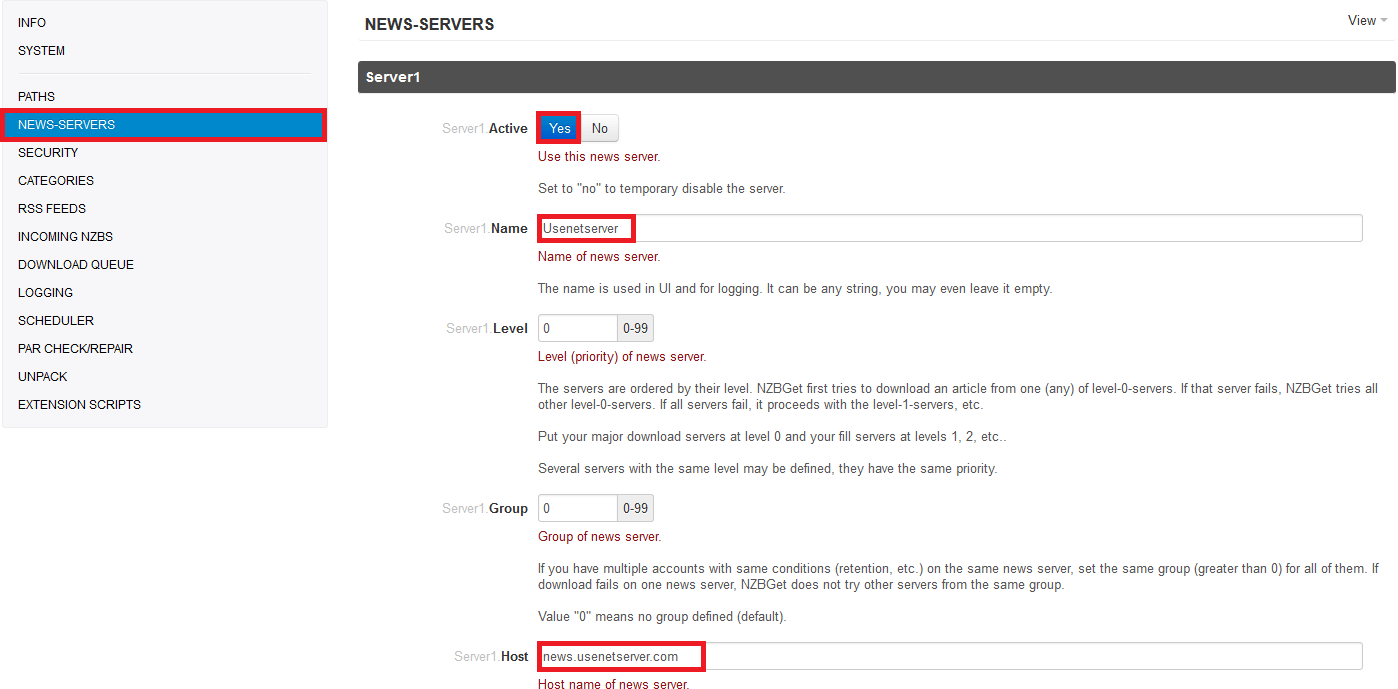
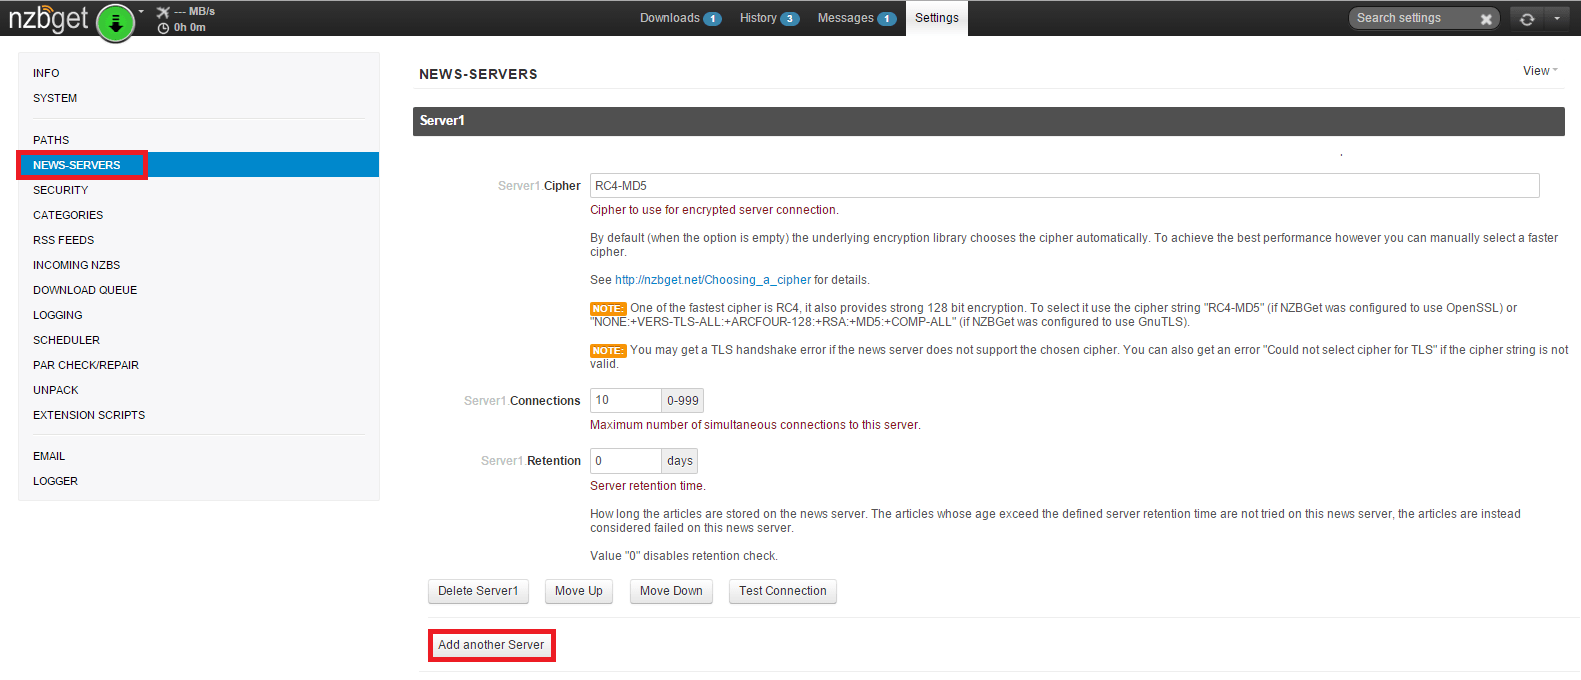
Now click NEWS-SERVERS. Make sure Server 1 is enabled and give your server a name like Usenetserver.
Enter your usenet provider's server address like news.usenetserver.com
Scroll down until port is at the top. Enter port 563 for SSL, your username and password.
Enable Encryption, enter 10 connections or whatever your provider's maximum amount is
If you are on a lower powered unit like a NAS, Banana or Raspberry Pi make the cipher RC4-MD5 since it is the fastest

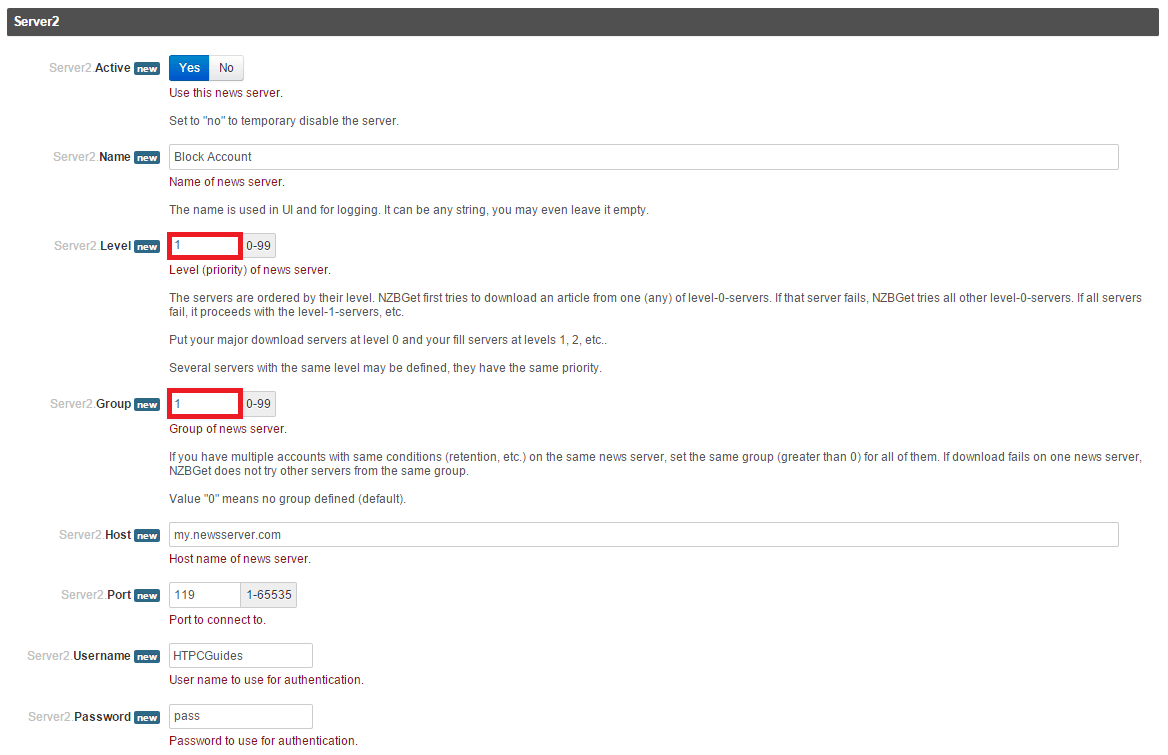
If you have a block account you can add it to NZBGet, click Add another server
Enter your credentials and port like you did for the main server
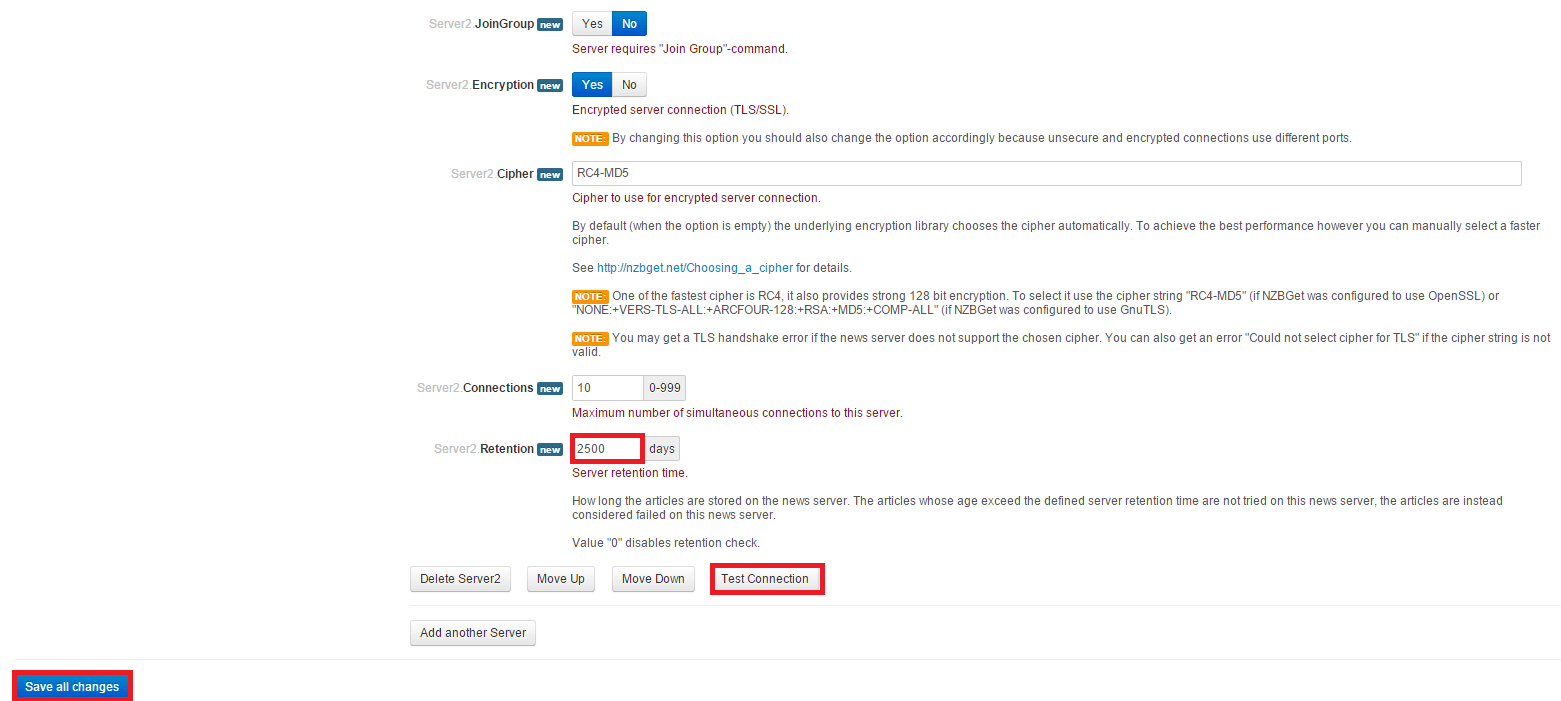
Choose 1 for the Group and 1 for Level
Enter the number of connections and whether to use SSL then click Test connection
If all goes well Save all changes
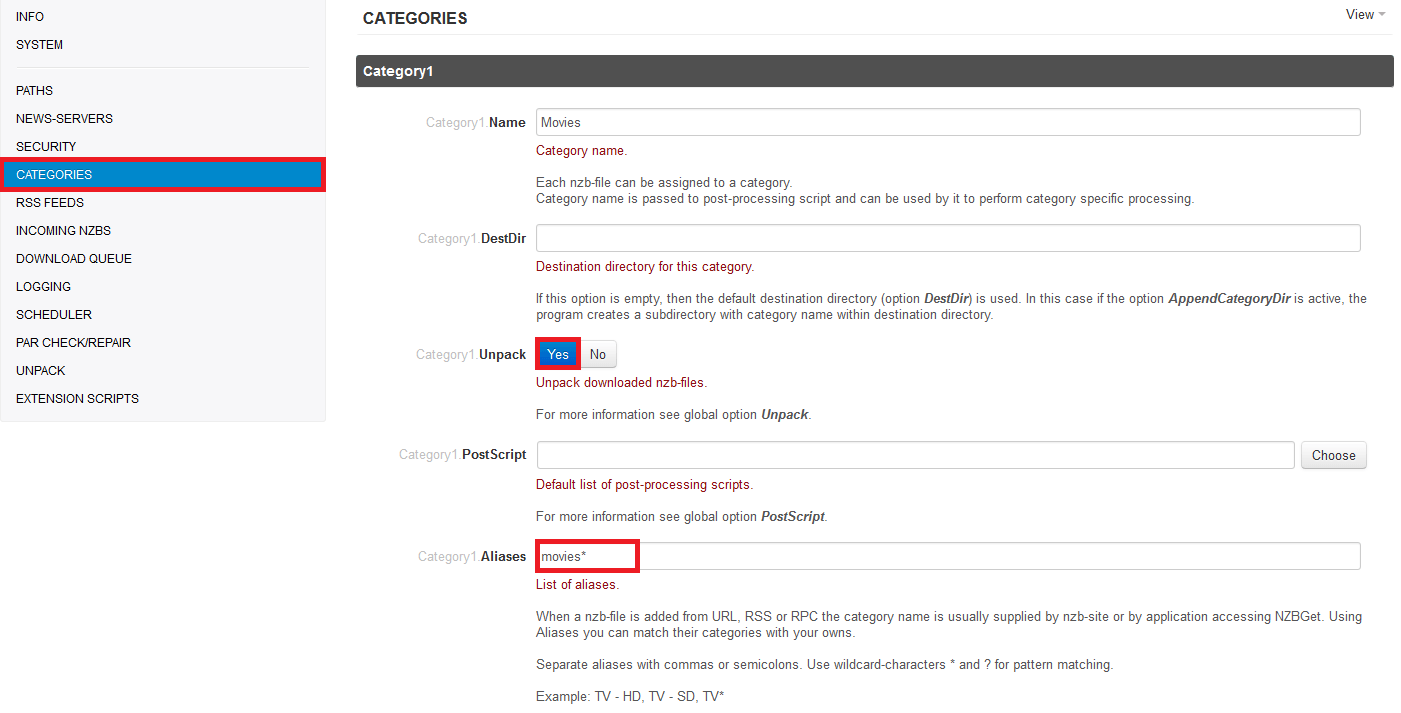
Now click CATEGORIES
Category 1 by default is movies, make sure Unpack is enabled. Add the Alias movies*
Adding aliases is useful when you get nzbs through private indexers then NZBGet can use the metadata to group the release in the appropriate category.
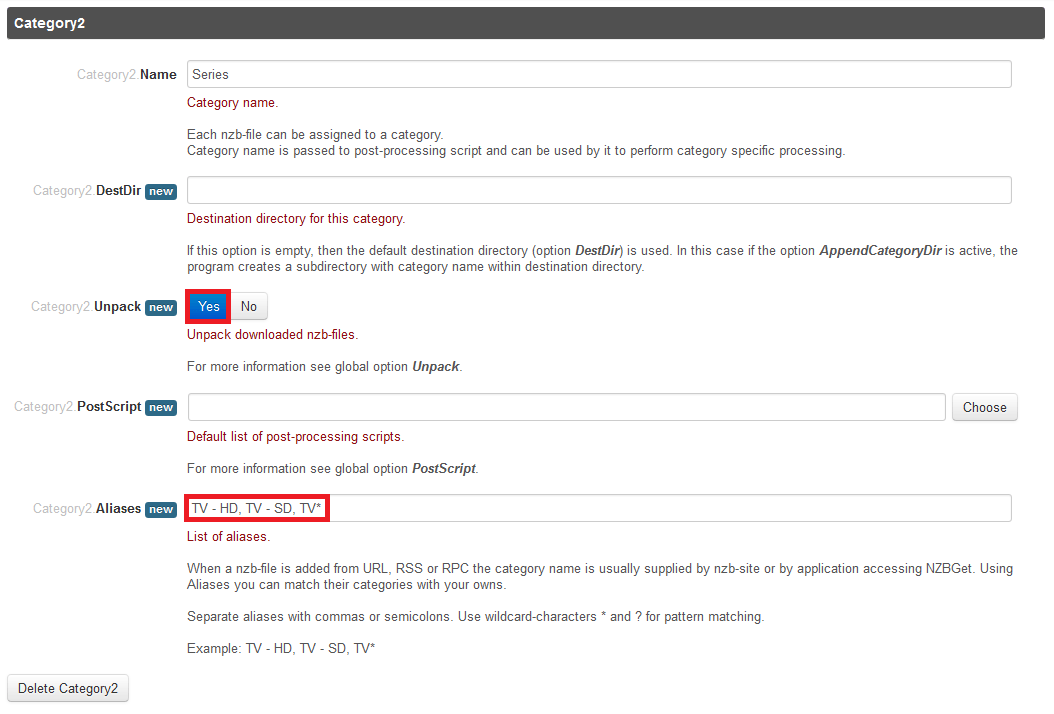
Scroll down until you see Category 2 which is for TV
Leave Series as the name or change it to TV, do remember if you do this as you may need the category name for Sonarr (NzbDrone) and SickRage.
Make sure Unpack is enabled. Add TV - HD, TV - SD, TV* as the Alias
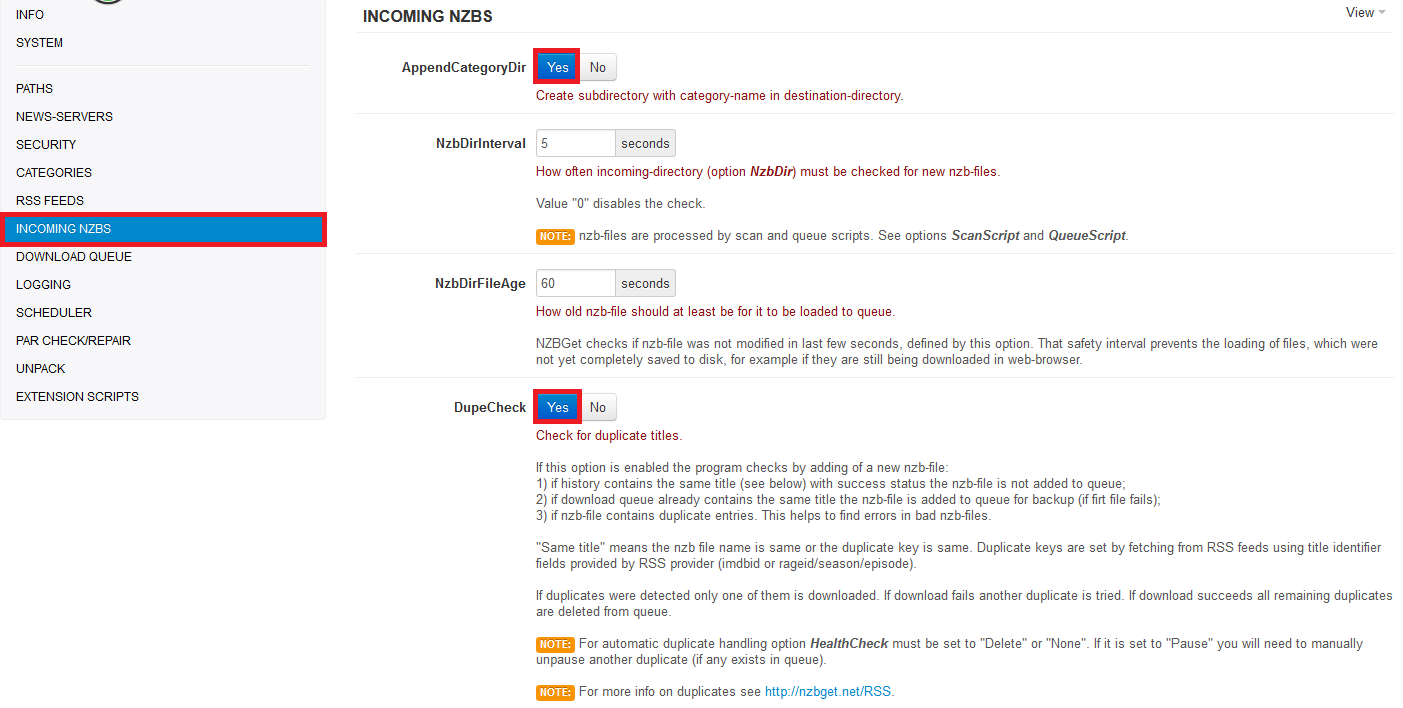
Click INCOMING NZBS
Make sure AppendCategoryDir is enabled to work with the categories we configured earlier. Note that you may need to disable this for some automation software like CouchPotato, SickRage or Sonarr.
Leave DupeCheck on, which will avoid downloading the same nzb file twice
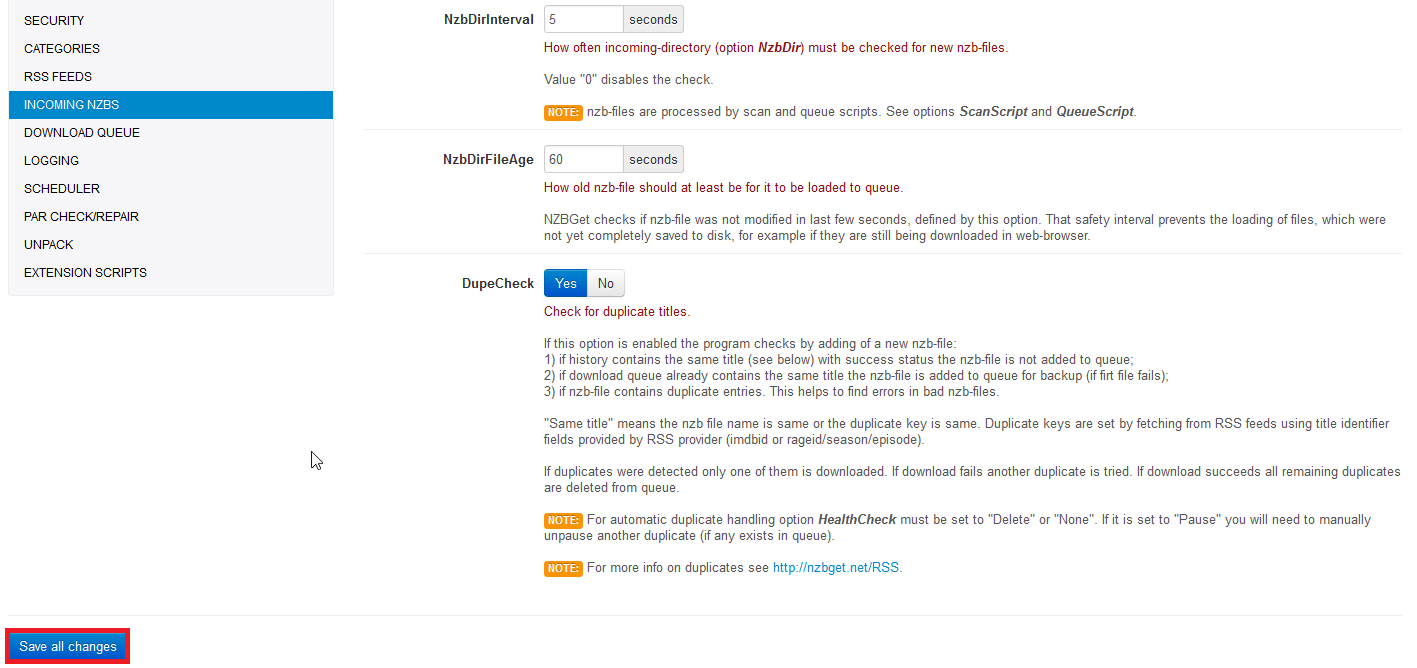
Scroll down until you see Save Changes in the bottom left corner and click it.
You will see that your configuration has been saved successfully. Click Reload NZBGet.

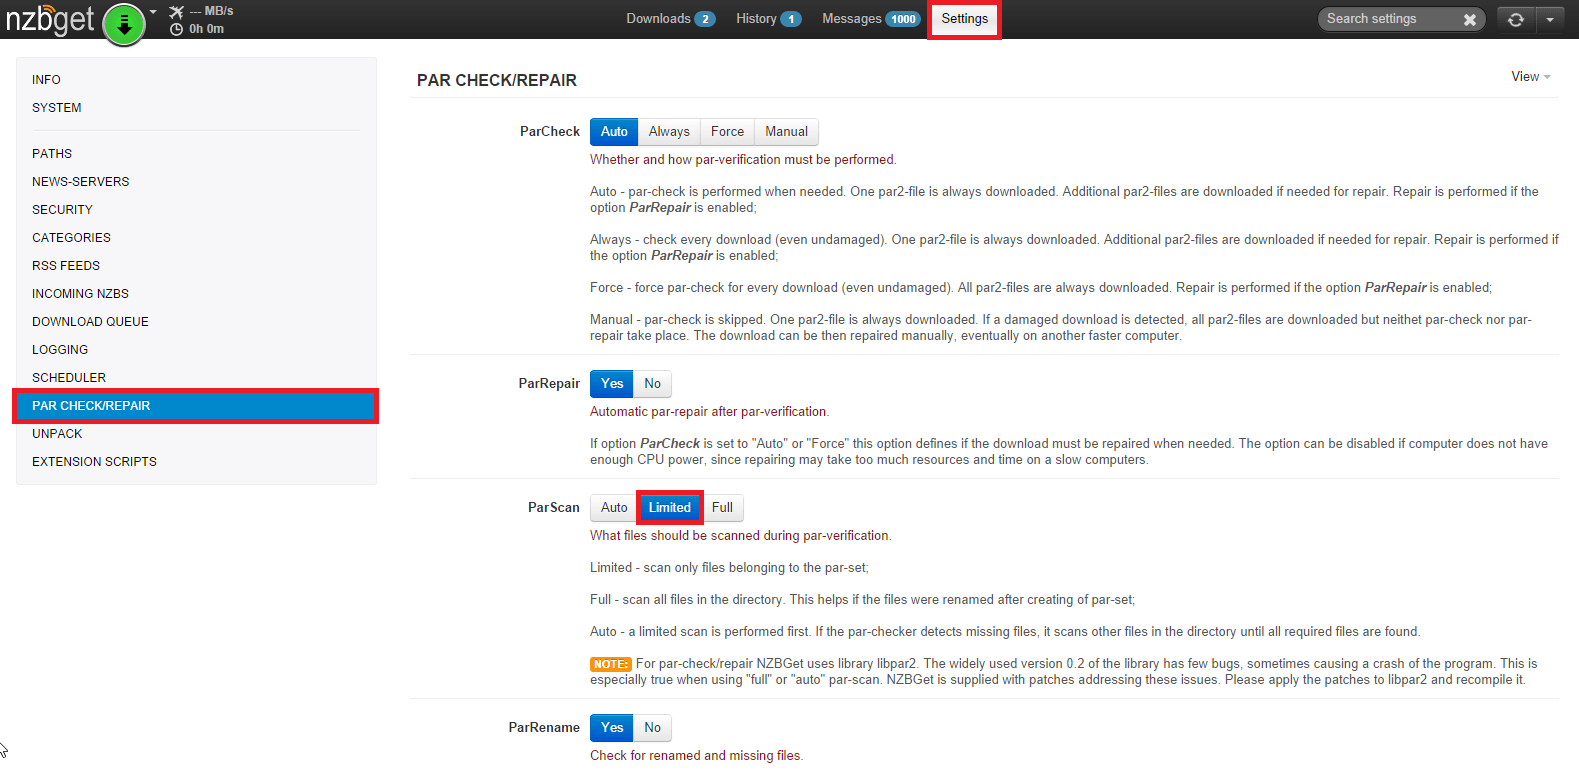
If you are on a low powered machine like a Raspberry Pi or NAS, you should change the Parscan options
Click Settings then PAR CHECK/REPAIR and change Parscan to Limited
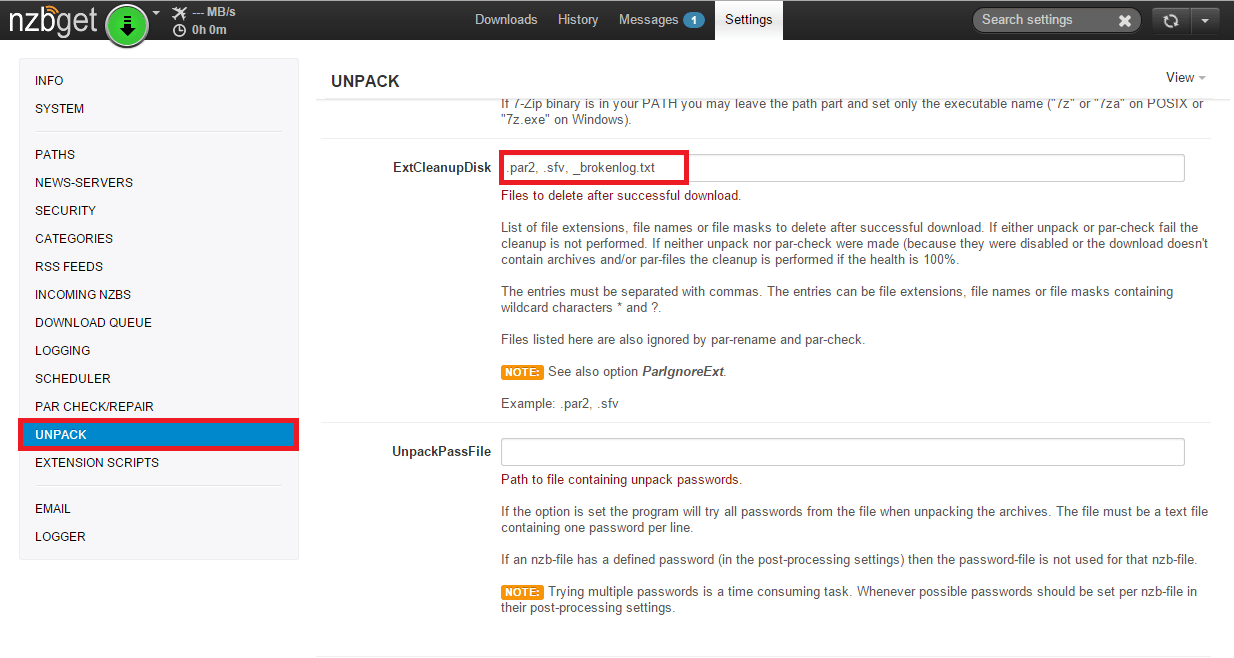
If you only plan on grabbing media files then you can have NZBGet cleanup unnecessary files in Settings -> Unpack -> ExtCleanupDisk and add the extentions in this format .nfo, .jpg, .exe, .bat
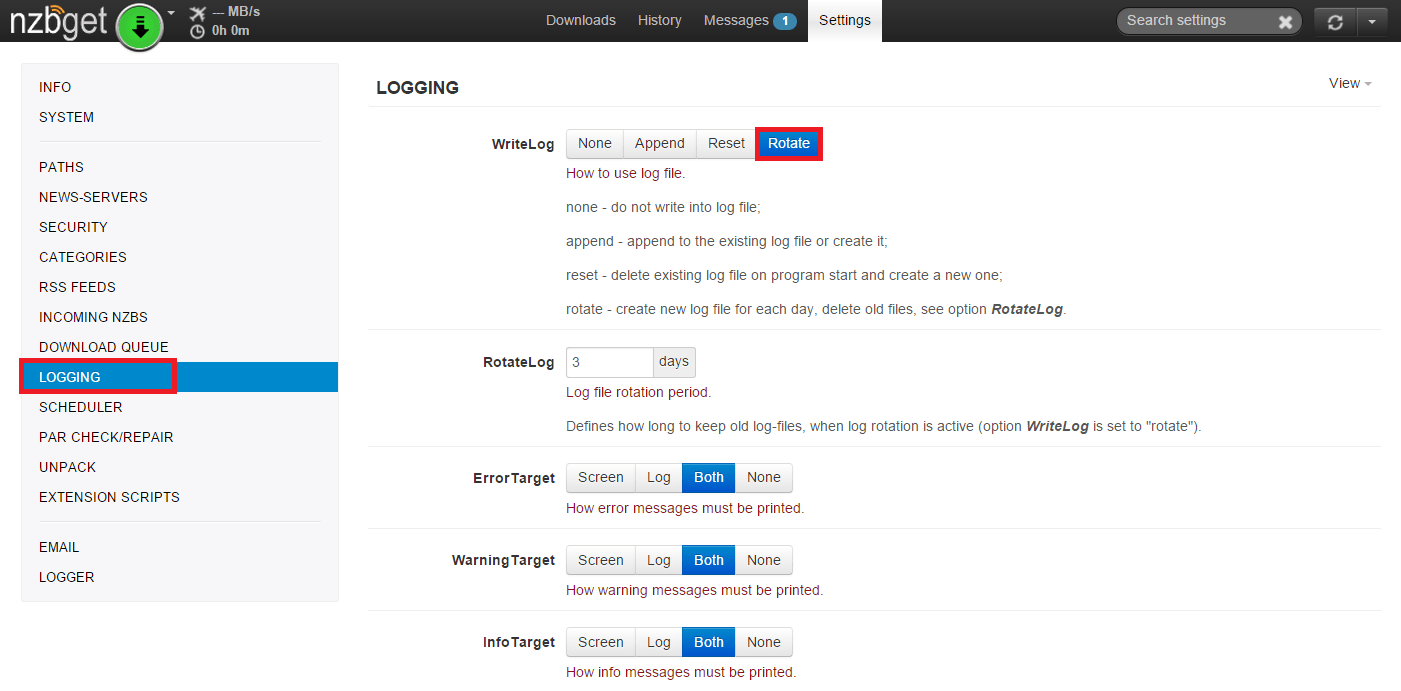
Make NZBGet rotate logs so they do not get unnecessarily large.
Click Logging in the left pane and for WriteLog set it to Rotate
The last thing to do is change the umask to avoid permission issues with NZBGet and SickRage, CouchPotato and Sonarr.
Click SETTINGS, then SECURITY and scroll down to umask, set umask to 0002 for 775 permissions.
Sonarr requires umask 007 or you will see this error:
Couldn't add report to download queue. *****.S01E11.HDTV.x264-LOL: Failed to add nzb *****.S01E11.HDTV.x264-That should do it as a basic configuration for NZBGet, see the low power devices configuration if you are on a Raspberry Pi or NAS device. Now you can move onto Sonarr and CouchPotato tutorials so you can automate your series and video file downloading.