 OpenMediaVault is an excellent NAS software solution with an easy-to-use graphical web interface for simple installation and management of many desirable plugins such as MiniDLNA, NZBGet, CouchPotato, SickRage and Transmission. This guide uses Minibian as a base. It is recommended to install OpenMediaVault on a clean, unaltered image. This guide has been tested on the Pi 2 but should also work on other Pi models. If you have not installed OpenMediaVault yet, follow the installation guide found here before proceeding.
If you are trying to figure out which hardware would work best for you, consider reading the Pi benchmarks.
| Pi Unit | ||||||||
|---|---|---|---|---|---|---|---|---|
| Raspberry Pi 3 | Quad Core |
|||||||
| Raspberry Pi 2 | Quad Core |
|||||||
| Raspberry Pi | Single Core |
|||||||
| Banana Pi | Dual Core |
|||||||
| Banana Pi Pro | Dual Core |
Install SickRage Plugin OpenMediaVault
Installing plugins is done through OpenMediaVault's web interface. Open a web browser and go to the IP address of your Raspberry Pi, the default user name is admin and the default password is openmediavault.
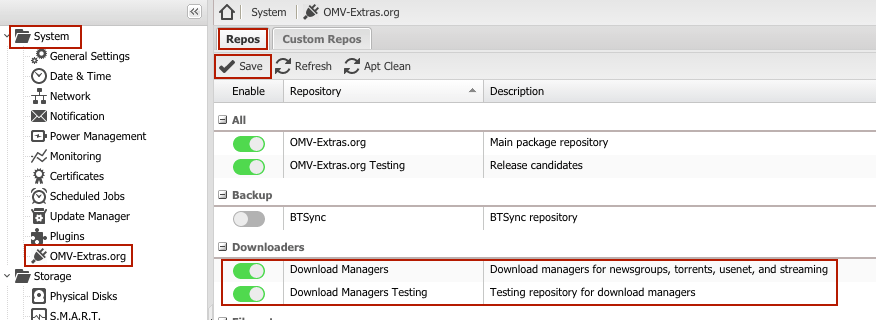
Go to System > OMV-Extras.org > Repos tab > enable both Download Managers and Download Managers Testing > click Save
Go to System > Plugins > type sickbeard as your search term > mark the checkbox next to the correct plugin > click Install
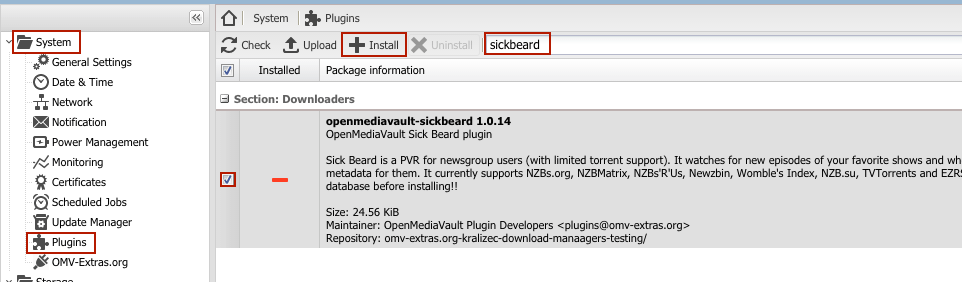
Confirm that you would like to install the plugin, click Yes

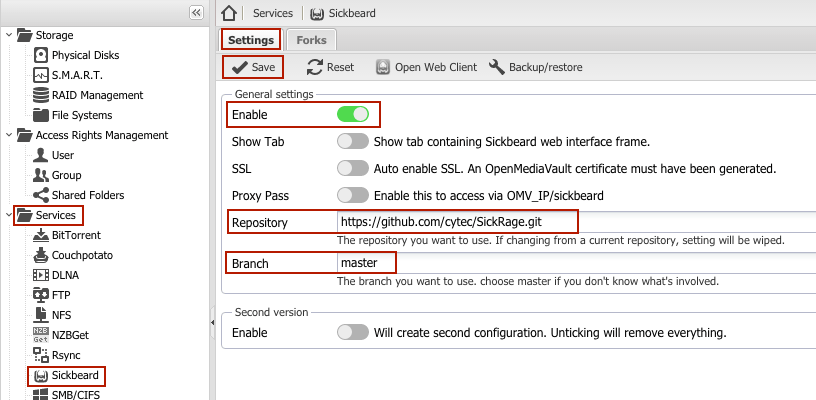
This will install the SickBeard plugin on OpenMediaVault, we will be able to install the SickRage plugin by selecting the appropriate repository within the SickBeard plugin. After the plugin is installed, it must be enabled. While in the OMV web interface, go to Services > SickBeard > Settings tab > select Enable > select your desired Repository (http://github.com/cytec/SickRage.git) > select your desired Branch (choose master if you don't have a preference) > click Save
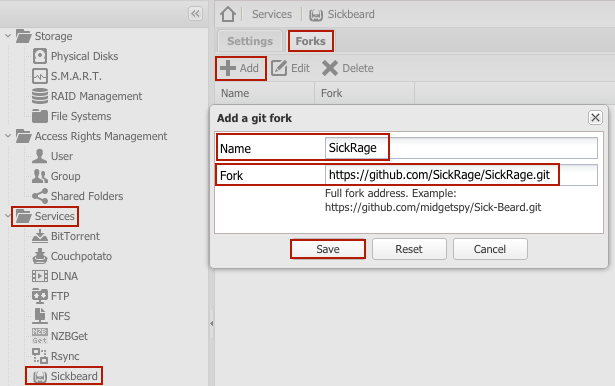
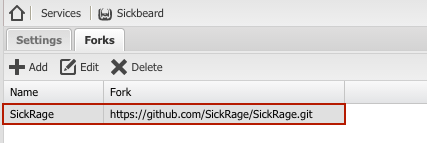
Go to Services > SickBeard > Forks tab > click Add > in the Name field write SickRage (or an appropriate description of your choosing) > in the Fork field add the repository https://github.com/SickRage/SickRage.git > click Save
After for the fork is successfully added, it will look like this:
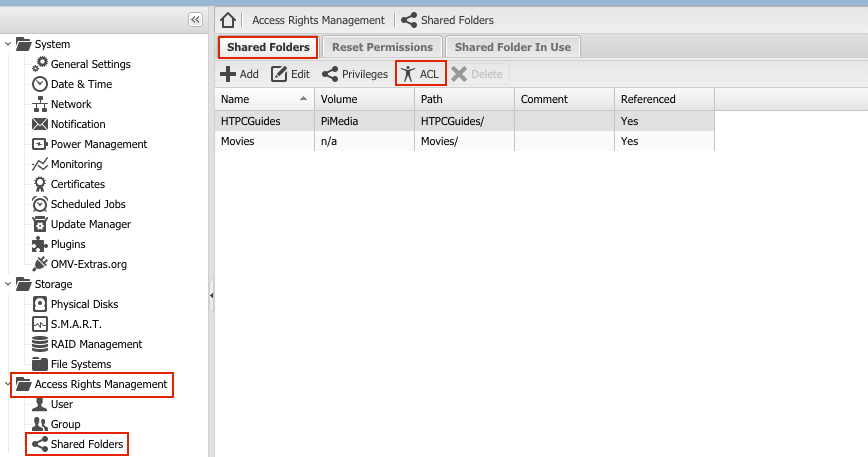
Now it is time to give the sickbeard user access to the shared folder(s) of your choosing. Go to Access Rights Management > Shared Folders > highlight the shared folder which it should have access to > click ACL
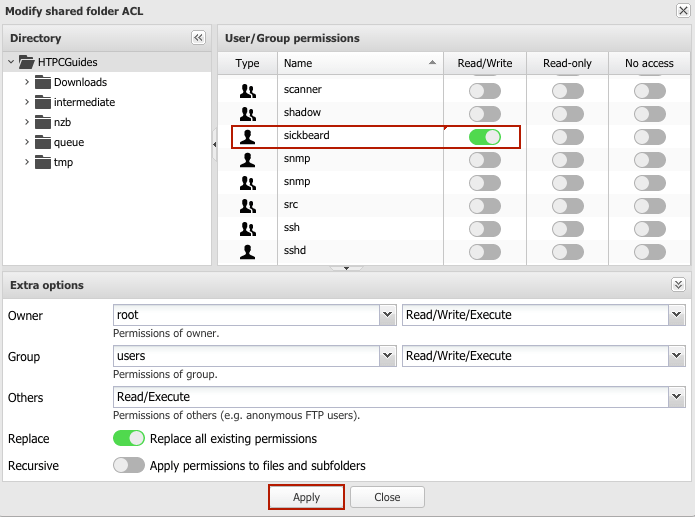
Find the sickbeard user and grant it permissions as desired > click Apply
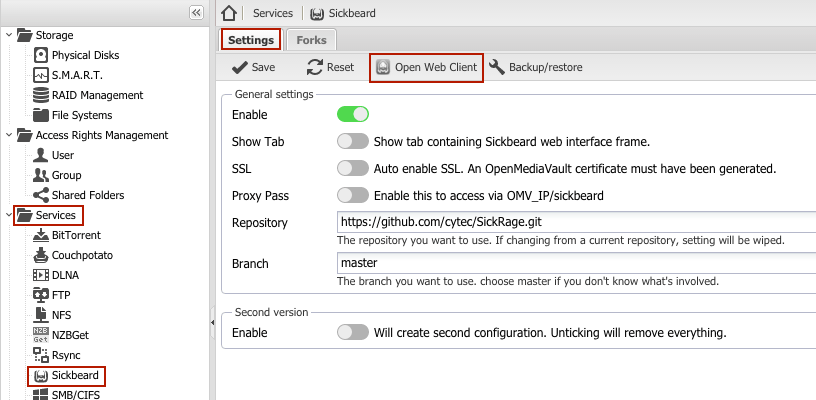
The SickRage web client can be accessed via the OpenMediaVault web interface. Go to Services > SickBeard > Settings tab > click Open Web Client
The SickRage plugin is now successfully installed on OpenMediaVault so you can start searching for and downloading desired files.