 This guide shows how to force Transmission Bittorrent client to use a VPN while retaining remote access to its WebUI (user interface) so you can access and manage your torrents outside your home network. You will need to know your network's IP information and have the machine use a static IP or reserved DHCP so it always has the same IP address.
For remotely accessing transmission using dynamic DNS you can use this guide for the Raspberry Pi so you get an easy to remember URL like http://htpcguides.crabdance.com:9091 for remote management of your torrents. That guide should work for other Debian based distros like Ubuntu. For this guide I am using PIA VPN which costs $3.33 per month (annually billed), they keep no logs and take many different anonymous payment methods. You can use Ubuntu, Lubuntu or any Debian based distro and it will work, regardless of the device or CPU architecture being used.
Consider reading Comparing Usenet vs Torrents – Which is Better?
Note: This guide was tested on Raspbian and Debian, it did not work on Raspbmc, if you do manage to alter the scripts so it works on Raspbmc please let me know in the comments.
Updated January 8, 2016 to resolve port forwarding issues.
Updated July 17, 2015 to fix bug in autodetection script and add color coding for clarity. Now includes later OpenVPN 2.2.1 compatibility using ifconfig_local (thanks Scott)
Disclaimer: This guide manipulates your IP tables so you are strongly urged to back up first!
I will walk you through installing OpenVPN, downloading the PIA OpenVPN configuration files and configuring automatically logging in to the VPN service. Then you will create some scripts. You should make sure you have remote access to transmission already first (found here).
I am assuming you are running the default transmission-daemon init.d scripts as they are installed by default. If you are using an upstart script you will have to change any instances of sudo service transmission-daemon to sudo service transmission if you followed my transmission guide for the Raspberry Pi. Regardless you will need transmission-daemon installed on the machine before you attempt this guide. You must also set port forwarding up in your router for port 9091 to the torrent client machine and disable the whitelist by setting rpc-whitelist-enabled to false.
The first script runs OpenVPN and tells it which configuration file you specify, calls an up script after the VPN is connected and a down script to run if OpenVPN stops.
The up script modifies the IP address transmission binds to in the settings.json file so it uses the Private Internet Access tun0 adapter's IP address. It also changes the IP tables so you can still remotely access transmission.
The down script stops the transmission torrent client
Note: If the VPN stops you will have to reboot the machine
If you used my Transmission guide for Raspberry Pi or are using any upstart script and not the init.d script you should change your start on line in the upstart script (thanks Peter) for maximum safety. Adding this line ensures the Transmission service does not start until the VPN interface is up.
start on net-device-added INTERFACE=tun0
Remote Access Transmission Torrent Behind VPN on Linux
Update Linux repos
sudo apt-get updateConfigure OpenVPN
Install OpenVPN and unzip
sudo apt-get install openvpn unzip -yEnter the OpenVPN folder
cd /etc/openvpnDownload the Private Internet Access openvpn configuration files (extension .ovpn), if you are using a different provider you will have to get the OpenVPN configuration files specific to your provider.
sudo wget --no-check-certificate https://www.privateinternetaccess.com/openvpn/openvpn.zipUnzip the openvpn configuration files
sudo unzip openvpn.zipCreate a login details text file so you can log on to the PIA VPN automatically
sudo nano /etc/openvpn/login.txtInput your username and password, replace username with your actual username and password with your actual VPN password in this format
username
password
Ctrl+X, Y and Enter to Save and Exit
Configure Transmission Daemon with OpenVPN
Note: If you used my transmission guide for the Raspberry or are using the upstart script, replace all instances of transmission-daemon in the torrentvpn.sh and torrentvpnstop.sh with just transmission instead for starting, stopping and restarting services.
Stop transmission
sudo service transmission-daemon stopDisable the transmission-daemon – this prevents it from automatically starting on boot. You will be starting it through OpenVPN instead.
sudo update-rc.d transmission-daemon disableMake sure transmission allows external IPs to access its Web Interface
Open the Settings file
sudo nano /etc/transmission-daemon/settings.jsonChange rpc-whitelist to false.
"rpc-whitelist-enabled": false,Reload the transmission-daemon
sudo service transmission-daemon reloadCreate the OpenVPN up script to force transmission to use the VPN
sudo nano /etc/openvpn/torrentvpn.shPaste the code below, be mindful of the following changes you may have to make, the command ip address can inform you about your IP information. Make sure you are using a static IP on your home machine or reserved DHCP also known as static DHCP.
NB: The script now can find these values on some systems for you if you are using ethernet but not WiFi
- Change
192.168.0.120to your torrent client machine's local IP ($MAINIPin script) - Change
192.168.0.0/24to your network (ends in 0 usually) and subnet mask (/24 represents 255.255.255.0) - Change
192.168.0.1to your network's default gateway ($GATEWAYIPin script) - If you are using a wireless adapter change
eth0towlan0
To help gather the IP information you can use this command
ip route listThis is a sample output which shows your IP address, your network address and default gateway
default via 192.168.40.1 dev eth0
192.168.40.0/24 dev eth0  proto kernel  scope link  src 192.168.40.135
Paste the torrentvpn.sh script (bugs fixed June 6, 2015 July 17, 2015)
If you are on RaspBMC remove sudo from the echo lines and the ip lines.
If on WiFi use wlan0 or whatever your Wireless adapter name is instead of eth0
If you have issues try changing $ifconfig_local to $ifconfig_remote
#!/bin/sh

#Script to modify the transmission settings to bind to the VPN IP
#HTPCGuides.com

#enter the /etc/openvpn directory
cd /etc/openvpn

#stop the transmission-daemon
sudo service transmission-daemon stop
#Plug the VPN IP into transmission, may need to change $ifconfig_local to $ifconfig_remote, disabled by default
#sed -i 's/.*"bind-address-ipv4":.*/    "bind-address-ipv4": \"'$ifconfig_local'\",/' /etc/transmission-daemon/settings.json

#add Open DNS servers, change to Google's 8.8.8.8 and 8.8.4.4 if you like
echo "nameserver 209.222.18.222" | sudo tee -a /etc/resolv.conf
echo "nameserver 209.222.18.218" | sudo tee -a /etc/resolv.conf

# add routing to retain remote access, use either the manual variables or automatic ones not both
MAINIP=192.168.0.120
GATEWAYIP=192.168.0.1
SUBNET=192.168.0.0/24

#automatic IP finding
#MAINIP=$(ip route | awk 'NR==3{print $9}')
#GATEWAYIP=$(ip route | awk 'NR==1{print $3}')
#SUBNET=$(ip route | awk 'NR==2{print $1}')

sudo ip rule add from $MAINIP table 128
sudo ip route add table 128 to $SUBNET dev eth0
sudo ip route add table 128 default via $GATEWAYIP

#start the transmission.daemon
sudo service transmission-daemon restart
Make the script you just created executable
sudo chmod +x /etc/openvpn/torrentvpn.shCreate OpenVPN transmission stop script, this automatically stops transmission if OpenVPN stops
sudo nano /etc/openvpn/torrentvpnstop.shPaste this script
#!/bin/sh

#OpenVPN stop transmission torrent script
#HTPCGuides.com

sudo service transmission-daemon stop
Make the transmission stop when OpenVPN stops script executable
sudo chmod +x /etc/openvpn/torrentvpnstop.shDisclaimer: Several users have issues with upstart breaking their system so it is not bootable, you should back up if you care about the integrity of your system!
If you don't want to use upstart you can add the contents of the /etc/init/openvpnsafe.conf below and add it to to /etc/rc.local
Install upstart if you understand the risks you can lose SSH and other issues, use the manual method instead!
sudo apt-get install upstartEnter Yes, do as I say! to continue
Create OpenVPN upstart script
sudo nano /etc/init/openvpnsafe.confPaste this code, replace Sweden.ovpn with your country of choice from the PIA configuration files in /etc/openvpn
Use the blue section if you want to add it to /etc/rc.local
#HTPCGuides.com OpenVPN and Transmission Startup
start on runlevel [12345]

script
cd /etc/openvpn
sudo openvpn --config /etc/openvpn/Sweden.ovpn --auth-user-pass /etc/openvpn/login.txt --script-security 2 --up /etc/openvpn/torrentvpn.sh --down /etc/openvpn/torrentvpnstop.sh
end script
Test that the sequence is working, it runs openvpn with the server you chose (here Sweden), uses the configuration file we made with the login credentials for the VPN, tells it to run the torrentvpn.sh after it has started and run the torrentvpnstop.sh if OpenVPN goes down.
cd /etc/openvpn
sudo openvpn --config /etc/openvpn/Sweden.ovpn --auth-user-pass /etc/openvpn/login.txt --script-security 2 --up /etc/openvpn/torrentvpn.sh --down /etc/openvpn/torrentvpnstop.sh
Try and remotely access transmission on port 9091 or whatever you have set it to
Now reboot if you want it all to start remotely.
sudo rebootTest Transmission is Using VPN
Go to your transmission client's interface e.g. http://htpcguides.crabdance.com:9091
Download the checkMyTorrentIp.torrent from TorGuard

Upload it to transmission by clicking the Open torrent button in the top left

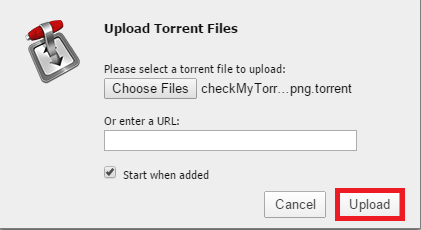
Click Choose Files and browse the the checkmytorrent.
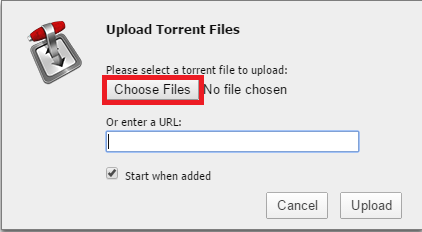
Click Upload
See your IP is masked. On a separate machine on your network check your IP in a browser like http://myip.dk or just google myip
![]()
Now you are all set to torrent safely to avoid those legal notices while still being able to remotely access and manage transmission for your torrents. Unfortunately you will have to reboot the system if something goes wrong with the VPN, this is because the ip rule and tables are added using the script and they cannot be re-added in the up script so it fails.
If you have useful tweaks to the scripts or made it work on another system, let me know in the comments below.