![]() Ubooquity is a server program written in Java used for serving your books and comics to all of your devices, inside our outside your home network. You can download the books onto your machine from the Ubooquity web interface and even view comics inside your browser. I have previously created a guide for installing Ubooquity on the Raspberry Pi and other guides will follow for Windows, Mac OSX and Linux (Ubuntu and Debian). This Ubooquity configuration guide will work on all operating systems and platforms running the Ubooquity server software.
Ubooquity is a server program written in Java used for serving your books and comics to all of your devices, inside our outside your home network. You can download the books onto your machine from the Ubooquity web interface and even view comics inside your browser. I have previously created a guide for installing Ubooquity on the Raspberry Pi and other guides will follow for Windows, Mac OSX and Linux (Ubuntu and Debian). This Ubooquity configuration guide will work on all operating systems and platforms running the Ubooquity server software.![]()
Configure Ubooquity for Personal eBook Server
Set up Nag free dynamic DNS if you want to access your book and comic collection outside your home network and forward port 2022 if you followed any of my installation guides.
You may be interested in using Mylar if you are a comic book fan. I have installation guides for all operating systems as well as a Mylar configuration guide.
| Usenet Provider | |||||||
|---|---|---|---|---|---|---|---|
| UsenetServer | |||||||
| Newshosting | |||||||
| Frugal | |||||||
| Usenetlink |
Initial Ubooquity Setup
Access the Ubooquity interface with your IP address at http://ip.address:2202/admin
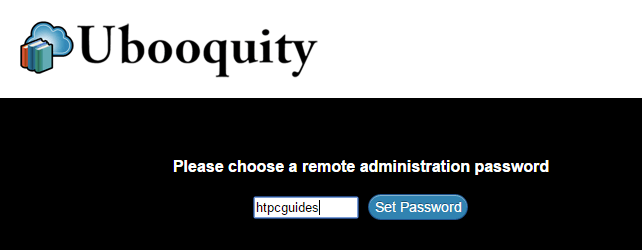
Choose a password for your admin account and click Set Password
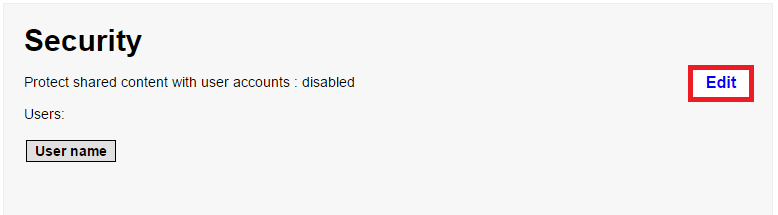
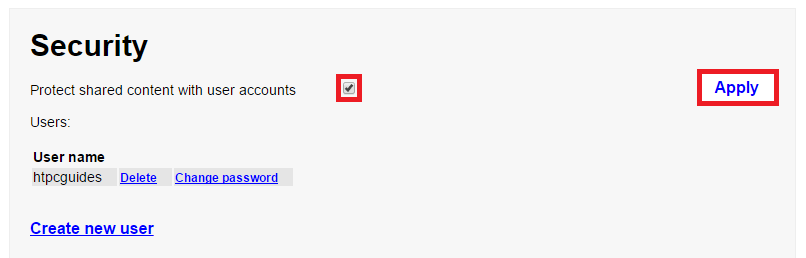
Create a user account, under Security click Edit
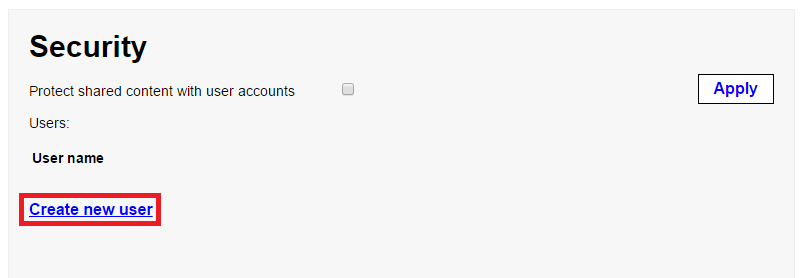
Click Create new user
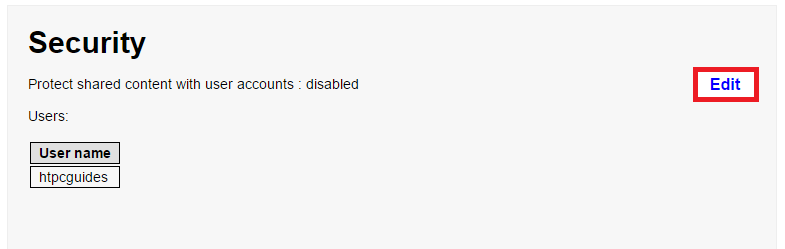
Click Edit and enter your new user name
Check Protect shared content with user accounts and then click Apply
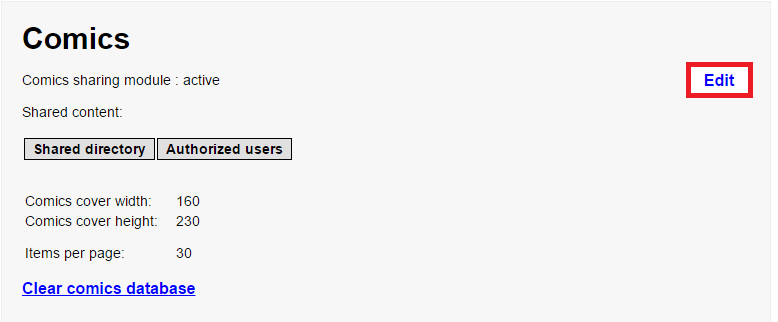
Add your comic storage location, under Comics click Edit
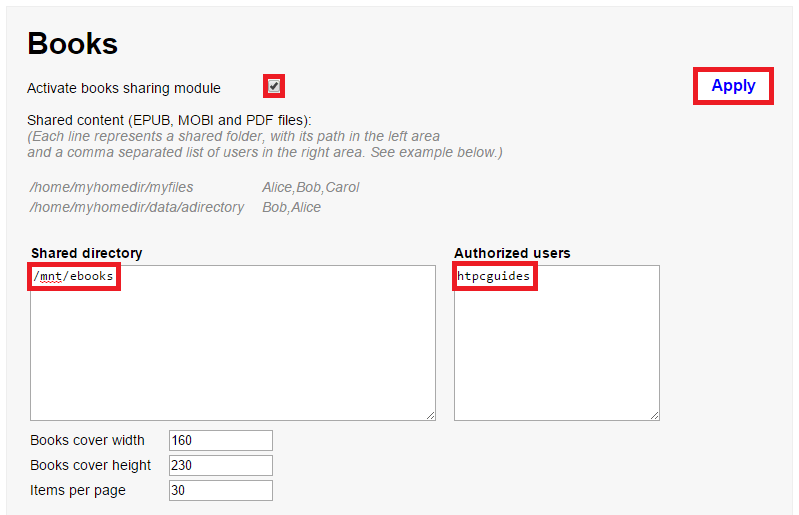
Manually type the Comics location under Shared directory and add the user under Authorized users
Check Activate comics sharing module and click Apply

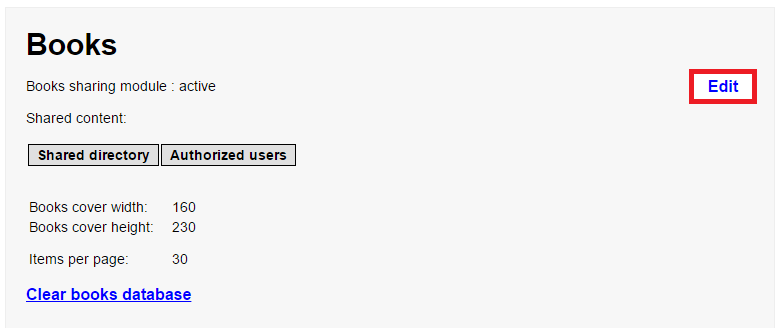
Add your comic storage location, under Books click Edit
Manually type the Books location under Shared directory and add the user under Authorized users
Check Activate comics sharing module and click Apply
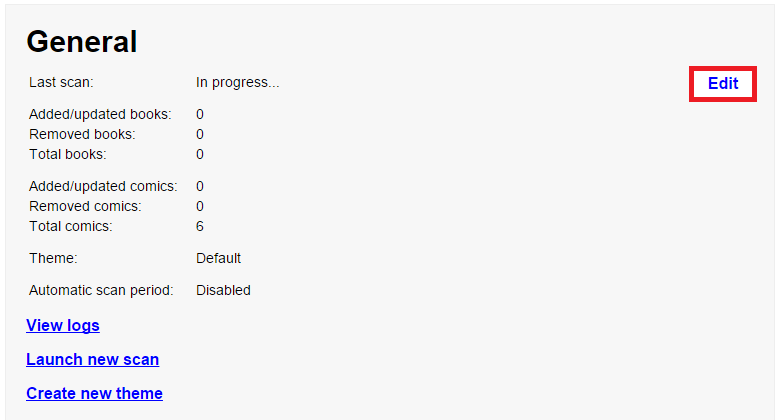
To set the library scan interval to update your library regularly, under General click Edit
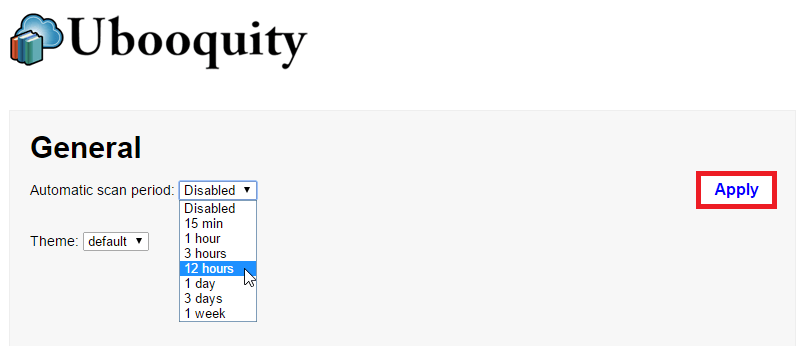
In Automatic scan period, choose your desired interval based on how often you get new comics or eBooks on your server
Click Apply
Access Ubooquity Books and Comics
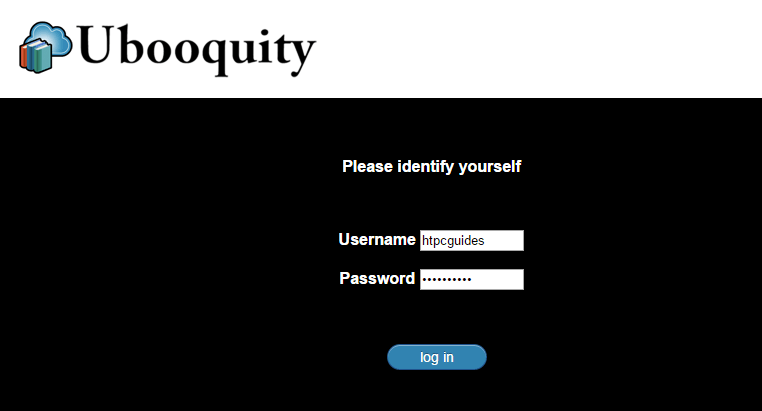
Open up a web browser and point it to http://ip.address:2022
Enter the username and password you created earlier
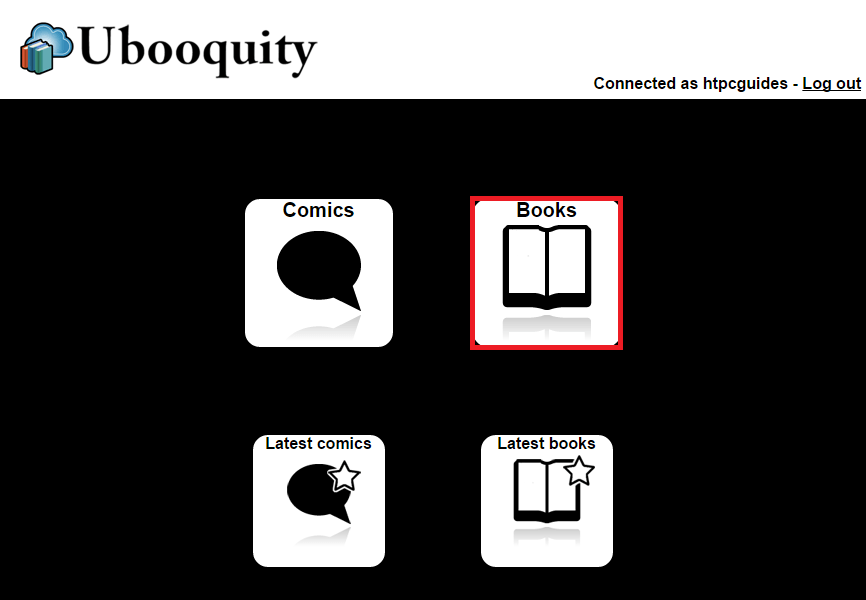
Click Books
I have added some public domain books by Charles Dickinson. Click Christmas Carol.

Now I can download the book straight to my computer from the Ubooquity server

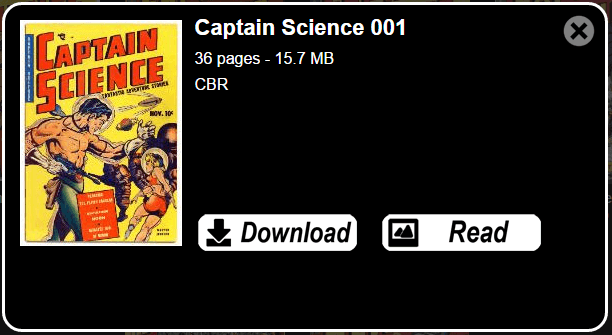
For comics, click Comics. I am using the public domain comic Captain Science
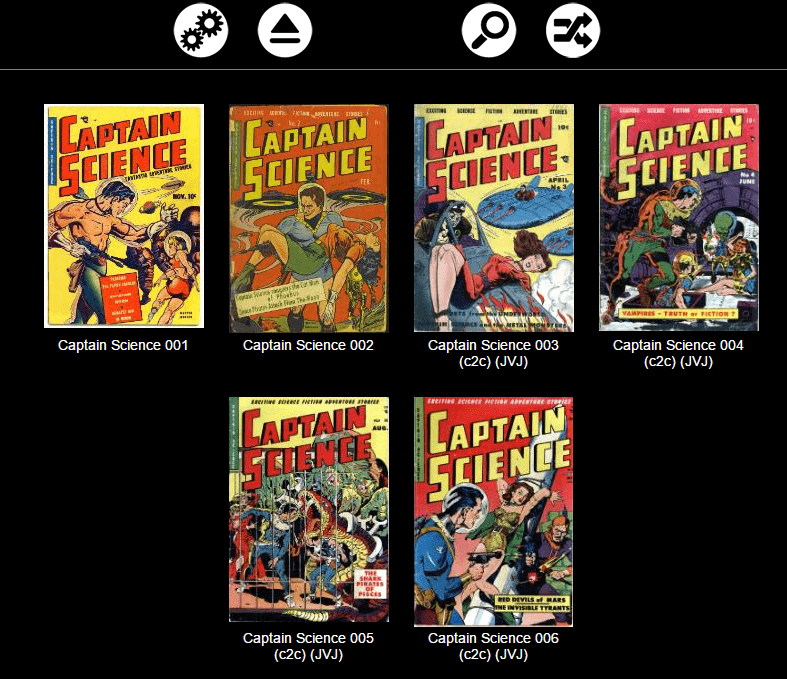
When I click issue 1 I can now Download or Read it straight in the browser.
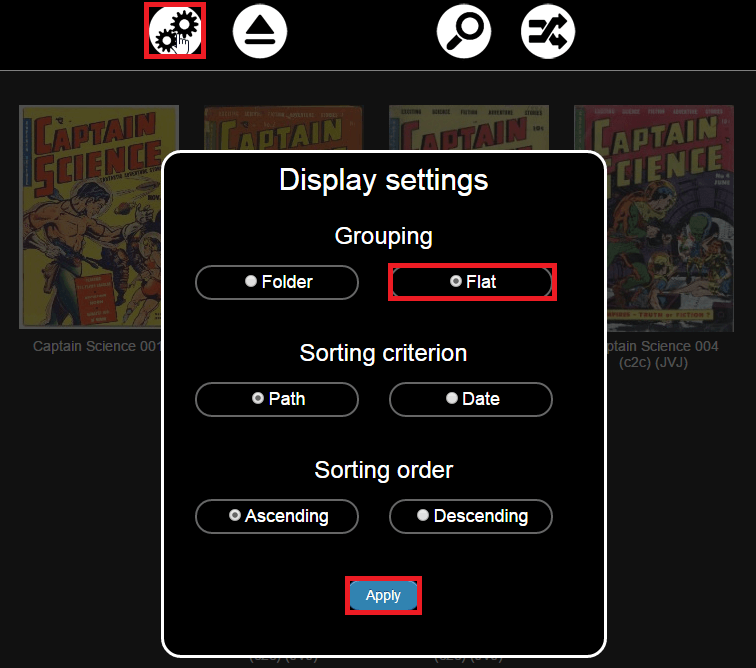
If you want to collapse collections, click the Settings cog at the top and under Grouping choose Flat
Click Apply
This concludes the configure Ubooquity for personal eBook server guide which should get you started for enjoying Ubooquity.