 VMPlayer test environments are incredibly useful for anyone who wants to tinker with new software. It lets you have a playground environment where you can play, break and mess around as much as you like on an operating system with no consequences to your real home media server operations. In my installing Ubuntu as a virtual machine guide, I mentioned that I like to have a pure, prepared image which I leave intact. The prepared image has VMware Tools so I can share folders with my host, drag-and-drop items and share my clipboard with the virtual machine. It also has some basic software installed like openssh and gparted that I use for preparing Pi images. This guide will show you how to clone that prepared image you have so that you do not have to reinstall VMtools, set up your shared folders and reinstall software all the time, just clone it and play with the clone. When you are done with the VMPlayer virtual machine clone, delete it and you can clone your original prepared image for your next project. This will work on Windows 7, 8 and 10 or any version that runs VMPlayer.
Clone VMPlayer Virtual Machines
VMWare Workstation lets you clone virtual machines as a built-in feature. VMPlayer does not so you have to clone (read: copy and paste) your virtual machines manually.
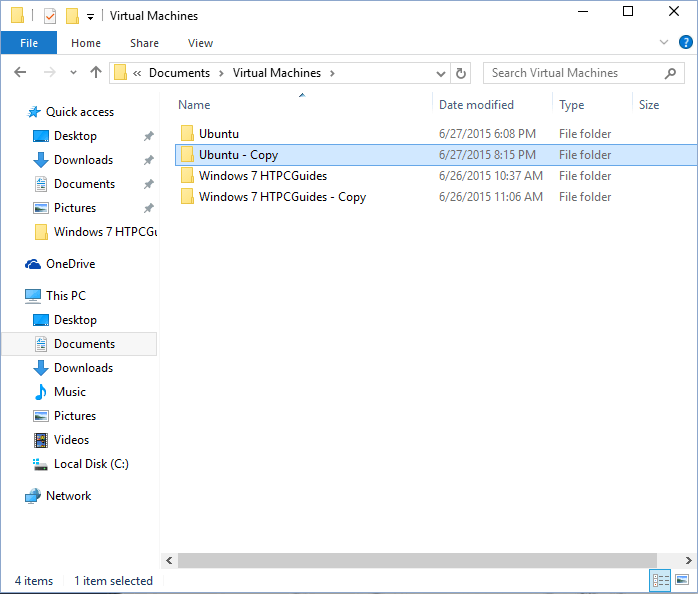
Go into your Documents folder and then choose Virtual Machines
Choose your Ubuntu folder – or the name you gave your virtual machine
Right click and choose Copy and then Paste in the same Virtual Machines directory.

Now you will have a Ubuntu Copy folder, this is the virtual machine that will be your test environment
Back in VMPlayer choose Open a Virtual Machine

Go into the Ubuntu Copy folder and open the Ubuntu file
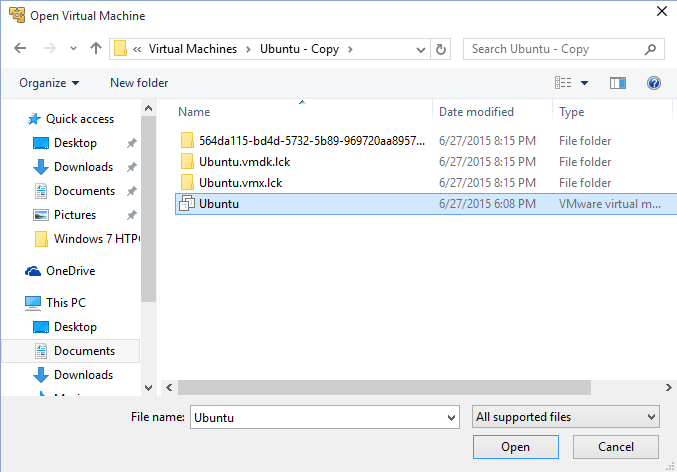
It will automatically be selected, we are going to rename it to avoid confusion
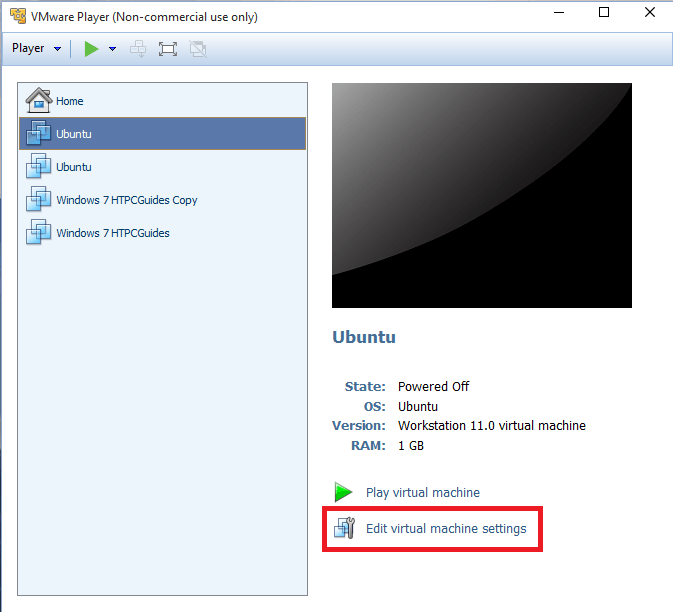
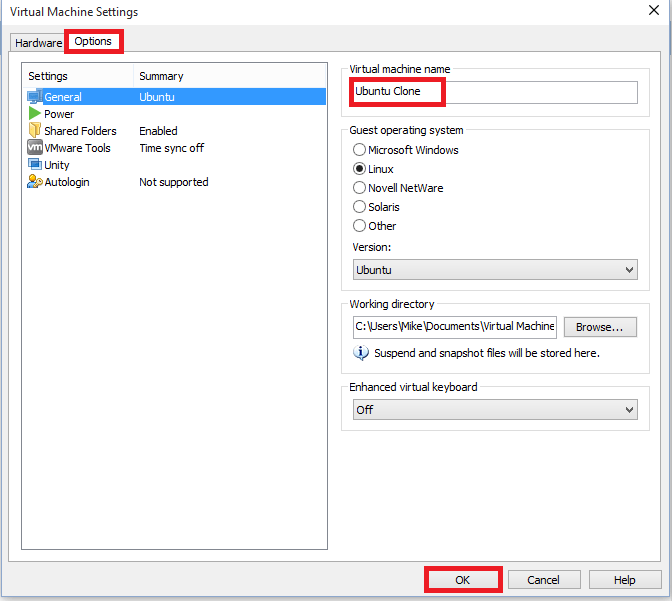
The new Ubuntu virtual machine will already be highlighted so click Edit virtual machine settings
Click the Options tab, then General under Settings and enter Ubuntu Clone as the Virtual machine name
Click OK
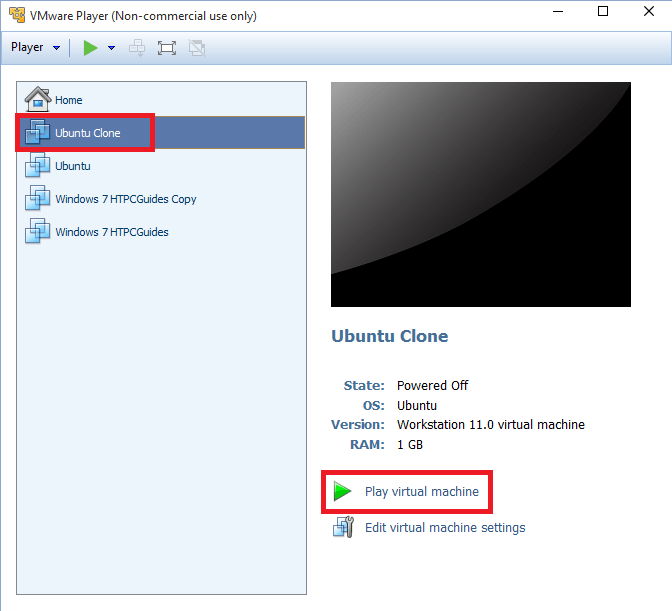
Now you can see your clone and your original pure virtual machine is still in tact.
Click Play virtual machine to start your Ubuntu clone
Mess around as much as you want, if you break anything just go delete the Ubuntu Copy folder in the C:\Users\Username\Documents\Virtual Machines and copy the original again.