 Test environments are incredibly useful for anyone who wants to tinker with new software. Virtual Machines lets you have a playground environment where you can test software before you install it on your actual home media server. I would bet most people do testing on their production environments. Your production environment is your live running environment that you depend on to do certain tasks. You do not want to break your production environment because you think it would be cool to test some new software – that is what virtual machines and test environments are for! I have fresh test environments for all Windows versions, Ubuntu, Debian, Mac OSX that I clone before I start testing a new guide. The original virtual machines are the pure, fresh installs which are then cloned so that I do not taint the original. When I'm done fully testing a guide I destroy the clone, I will show you how to quite easily clone virtual machines in a follow up guide with VMPlayer the VirtualBox alternative.
I prefer VMPlayer to VirtualBox because I find it far more reliable for making your life easier with the additional virtual machine perks. You can copy and paste from your host machine into the virtual machines – this is very unreliable with VirtualBox in my experience. You can easily drag and drop files from your virtual machine to your host machine and add shared folders from your host machine into your virtual machine. These features require the VMware tools which I show you how to install on Ubuntu as well.
VMPlayer is the free version of VM Workstation which I get for free through my school. VM Workstation lets you clone directly in the program, with VMPlayer you have to manually copy the virtual machine folders. VM Workstation also lets you tab through your multiple running virtual machines. Mac users can use VMware Fusion which is also free but has a Pro version similar to VM Workstation.
Why use Virtual Machines?
- You don't break your systems you rely on like your home media server
- Test new guides or software safely
- Test questionable software you find on the internet without risking malware or viruses
- Practice setting up your media server
- Easily start over if you break something in your virtual machine test environment
- Share clipboards to copy and paste between your host machine and virtual machine
- Share files and folders between your host machine and virtual machine including drag and drop
- Test the HTPC Guides installer
- Use it for resizing your Raspberry Pi or Banana Pi sd card
The best practice for virtual machines is to make a fresh install and prepare it the way you like it (include shared folders, software you will always need etc) and then you leave that image alone, you don't work on it anymore unless you are updating the core software you use. Instead you clone the fresh virtual machine and plan in the cloned machine, this way if you fuck anything up it won't harm your pure working virtual machine.
Install Ubuntu Virtual Machine Test Environment with VMPlayer
Download VMPlayer which is free or VMware Fusion (also free) for Mac users.
Download a Ubuntu ISO, the desktop version includes a GUI whereas the server version is just good old command line
Create Ubuntu Virtual Machine in VMPlayer
Once installed click Create a New Virtual Machine
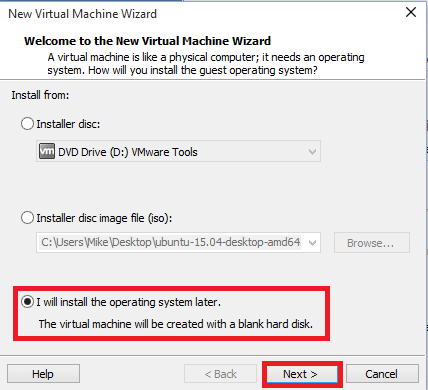
VMPlayer tries to be helpful, if you choose the iso here it will often autoinstall for you, however if you use a non-US keyboard layout you will automatically get US and can make things annoying.
I always choose to install later so this guide will assume that is what you are doing. If you choose autoinstall you can skip the next section heading Install Ubuntu.
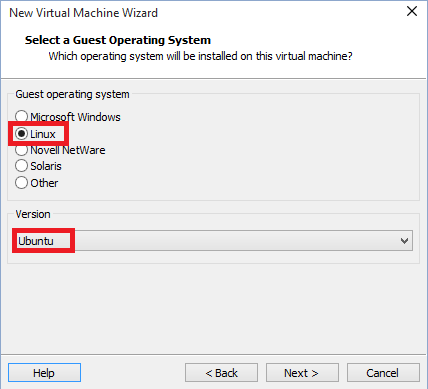
Choose Linux as your operating system type
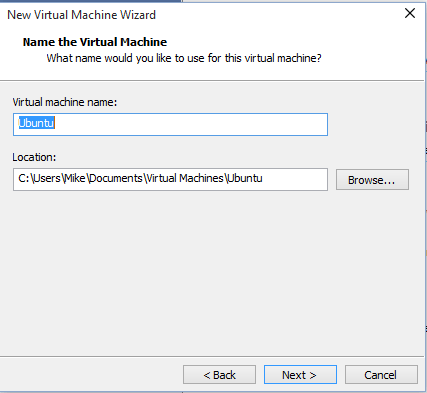
Give your virtual machine a name
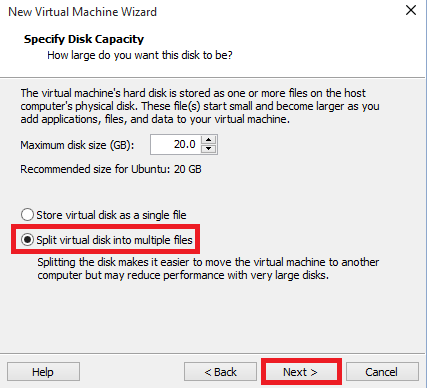
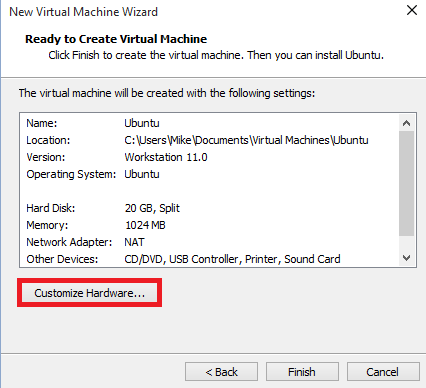
Choose how much disk space you want to provision for the Ubuntu virtual machine. Choosing 20 GB does not mean it will instantly take up 20 GB, it just means the virtual hard disk will automatically expand up to 20 GB as you use more of its space
I split the virtual disk into multiple files so it's easier to move them
Choose Customize Hardware
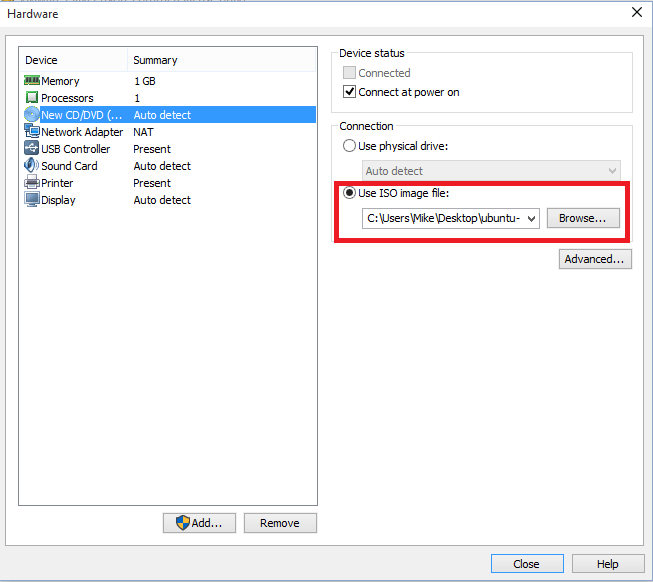
Click New CD/DVD Auto detect
Click Use ISO image file and click Browse and choose your Ubuntu ISO you downloaded
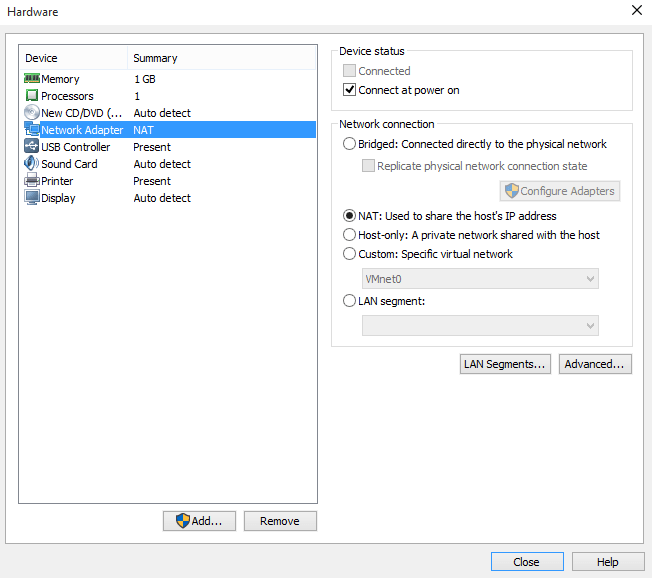
Click Network in the left pane next. This is where you will choose how you want to set up the virtual network for your virtual machine.
Two options I use are NAT and Bridged. Bridged allows the virtual machine to just pass through your wireless or ethernet adapter and contact your router at home to get an IP address that will be on the same network as your host machine. If your host machine has IP 192.168.40.100 then your virtual machine will have an IP like 192.168.40.110. This option is useful if you want other machines on your network to communicate with the virtual machine.
NAT makes your host into a DHCP server and router, it essentially makes the WAN port your direct connection to your home router. Using this option your virtual machine will get an IP that is on a different network from your home network. If your host machine has IP 192.168.40.100 then your virtual machine will get an IP like 192.168.89.132, you will still be able to SSH into it but other machines on your network will not be able to easily communicate with the virtual machine.
Click Close
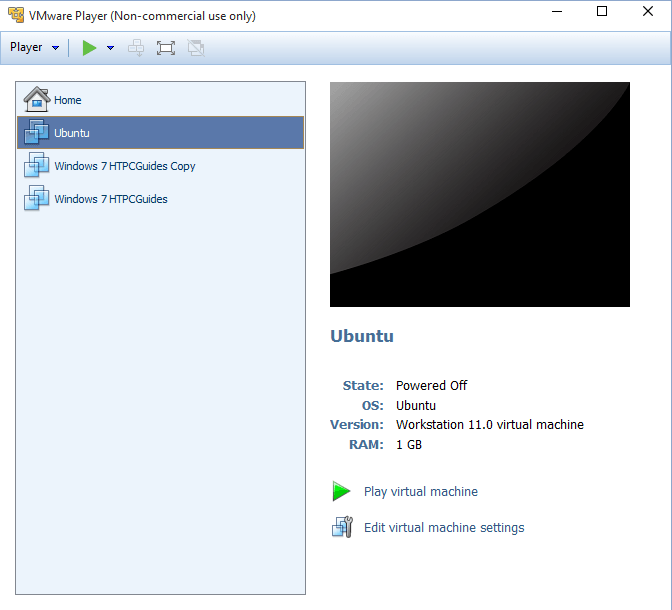
Now you can play your virtual machine by selecting the Ubuntu virtual machine name and clicking Play virtual machine
Install Ubuntu on VMPlayer Virtual Machine
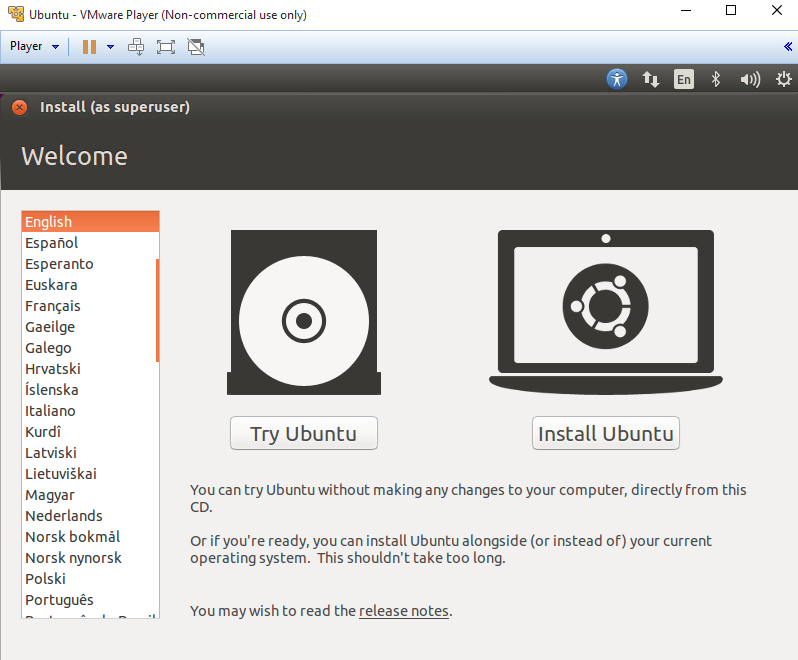
This is the Ubuntu installation wizard, click Install Ubuntu
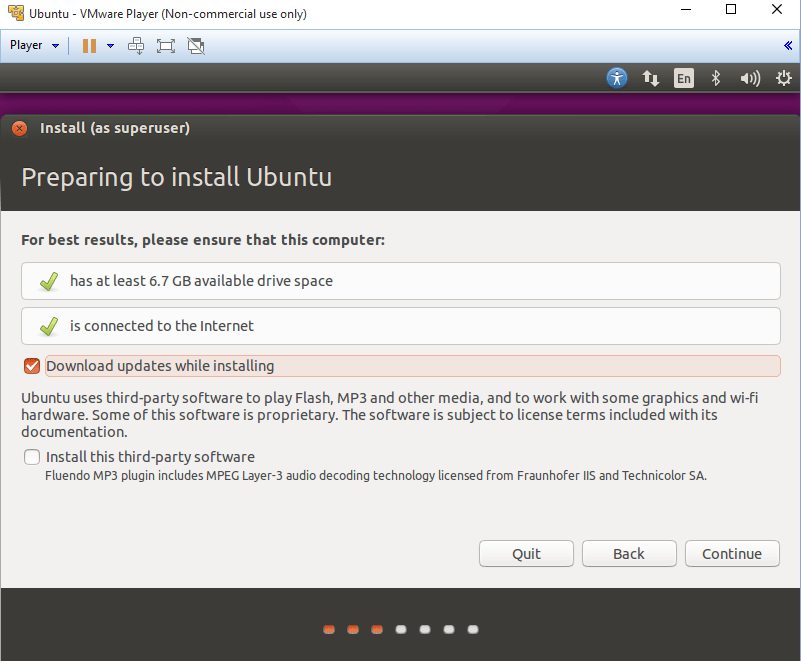
Check Download updates while installing and click Continue
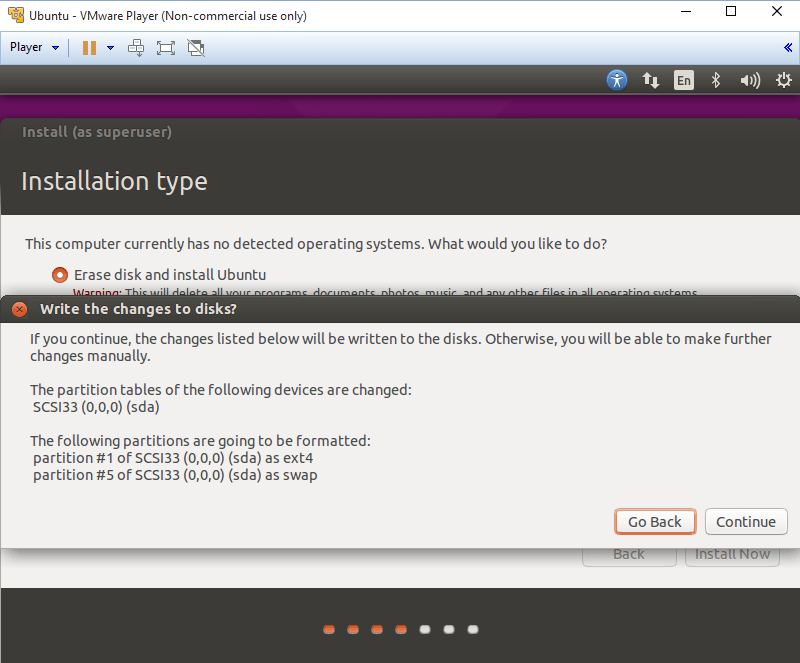
For Installation type choose Erase disk and Install Ubuntu
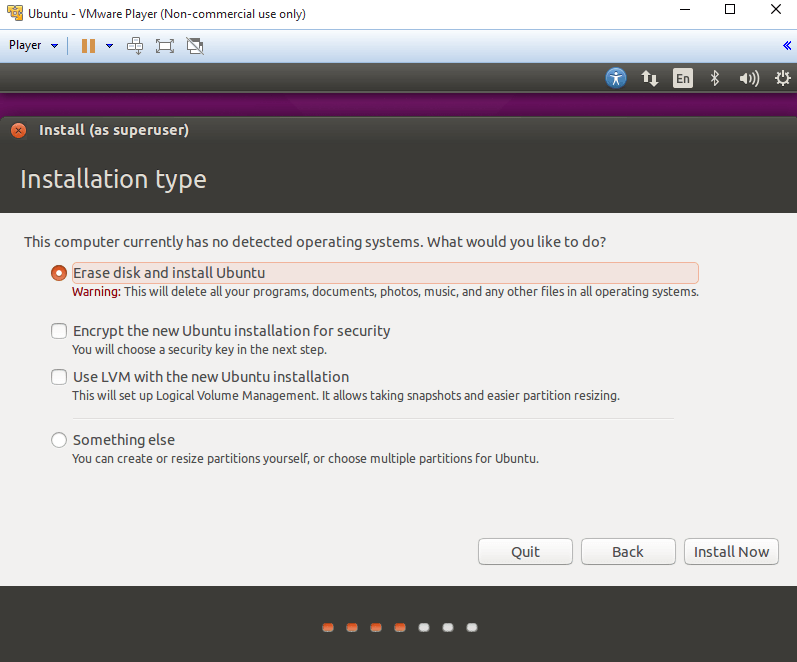
Click Continue when you get the warning
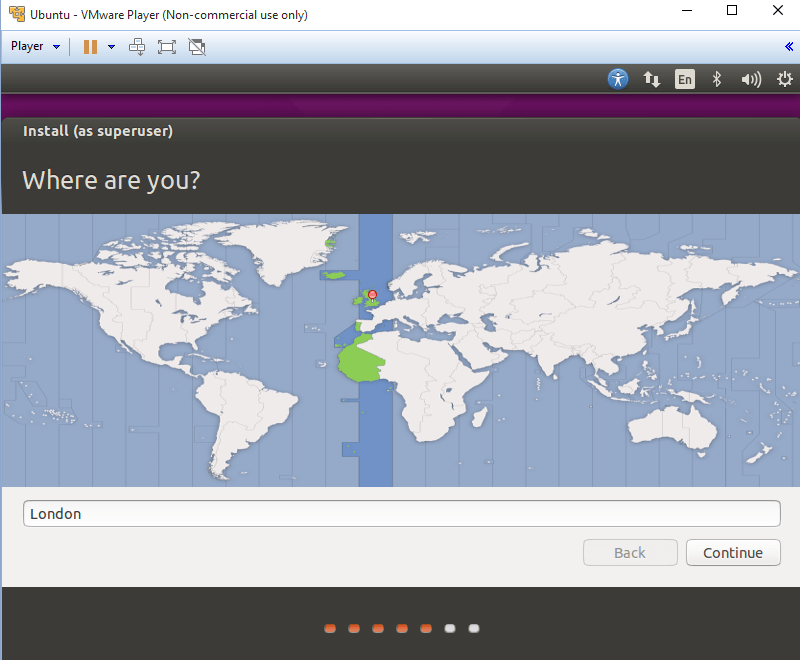
Choose your timezone and click Continue
Here is where you select your Keyboard layout

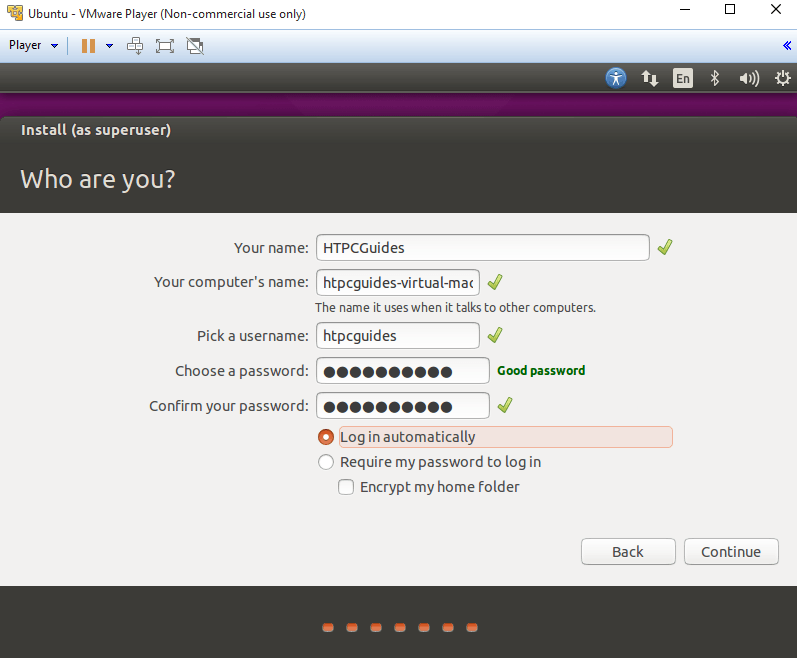
Enter your name and password, I let it log in automatically as well
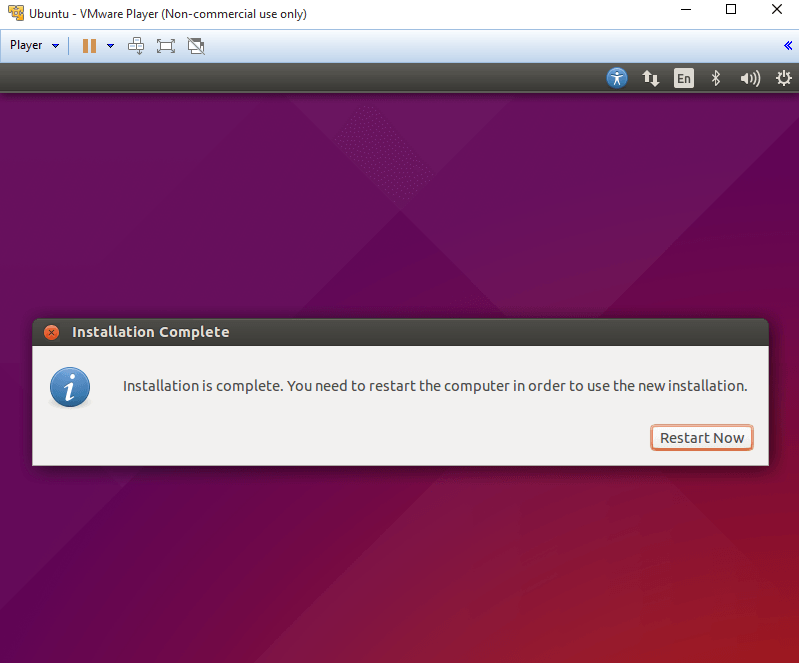
Time to Restart the Ubuntu virtual machine now
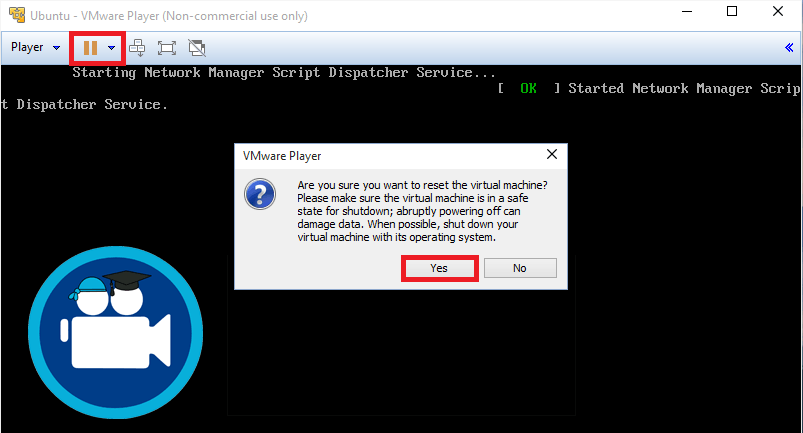
VMPlayer may freeze at the first reboot after installation but it is easily fixable.
Click the arrow pointing down next to the orange pause button and choose Reset and say Yes to the warning
Enable SSH in Ubuntu Virtual Machine
I like to use openssh server so I can just have the virtual machine running in the background.
In terminal install openssh server
sudo apt-get install openssh-server -yI disable password authentication for my main sudo user htpcguides since it is a local test environment security is not really a concern for me
To edit the sudo settings, this command opens them up
sudo visudoFind this section and add your username, mine is htpcguides and make it match the line below %sudo
%sudo    ALL=(ALL:ALL) ALL

htpcguides ALL=NOPASSWD: ALL
You could also just change the %sudo line and it will apply to all members of the sudo group.
%sudo ALL=(ALL:ALL) NOPASSWD: ALLCtrl+X, Y and Enter to save your sudo settings
Restart the openssh server
sudo service ssh restartTo get the IP address of your Ubuntu virtual machine type this command
ifconfigYou will see output like this, I can now use Putty to SSH into the VM using IP 192.168.89.133.
eth0      Link encap:Ethernet  HWaddr 00:0c:29:3e:02:e4
          inet addr:192.168.89.133  Bcast:192.168.89.255  Mask:255.255.255.0
Now you can use Putty to SSH into your Ubuntu virtual machine using the IP address you just found and let the virtual machine just run in the background.
You Ubuntu virtual machine is now complete. Install VMware tools using this guide for sharing clipboards between your host and virtual machine will follow as well as how to share folders and enable dragging and dropping to copy files between the virtual and real machine. Do clone your virtual machine afterwards to make your life easier.